Rebecca Autry Creations
  • Home
  • Piñata’s
  • Vacation Bible School
  • Wedding
  • Courses
  • Store

Lifeways VBS 2025 Theme: “Magnified” Snack Ideas

June 10, 2024 by rautry

Lifeways VBS 2025 Theme: “Magnified” Snack Ideas

Vacation Bible School (VBS) is always a time of excitement and joy for children, and having an engaging theme like “Magnified” for Lifeways VBS 2025 makes it even more special. To make your VBS week memorable, here are some creative snack ideas that align perfectly with the “Magnified” theme.

1. Magnifying Glass Cookies

Ingredients:

  • Sugar cookies
  • White icing
  • Black licorice
  • Clear sugar crystals

Instructions:

  1. Start by baking your favorite sugar cookies. Once cool, spread a layer of white icing on each cookie.
  2. Place a black licorice circle around the edge of the cookie to represent the frame of the magnifying glass.
  3. Sprinkle clear sugar crystals in the center to give it a “magnified” effect.

2. Insect Ants on a Log

Ingredients:

  • Celery sticks
  • Peanut butter or cream cheese
  • Raisins or chocolate chips

Instructions:

  1. Cut celery sticks into snack-sized pieces.
  2. Fill the center of the celery sticks with peanut butter or cream cheese.
  3. Place raisins or chocolate chips in a line on top of the filling to mimic ants walking on a log.

3. Microscope Mini Pizzas

Ingredients:

  • English muffins or mini bagels
  • Pizza sauce
  • Shredded mozzarella cheese
  • Pepperoni slices and veggie toppings

Instructions:

  1. Slice the English muffins or mini bagels in half and lay them out on a baking sheet.
  2. Spread a thin layer of pizza sauce on each half.
  3. Sprinkle shredded mozzarella cheese and add pepperoni slices and veggies to create fun designs, reminiscent of specimens under a microscope.
  4. Bake until the cheese is melted and bubbly.

4. Binocular Brownies

Ingredients:

  • Brownie mix (or pre-made brownies)
  • Chocolate frosting
  • Pretzel sticks
  • M&M’s or other round candies

Instructions:

  1. Bake brownies according to the package instructions and let them cool.
  2. Cut the brownies into small rectangular shapes.
  3. Spread chocolate frosting on top.
  4. Use pretzel sticks to create the “binocular” handles and place M&M’s on top to simulate the lenses.

5. Discovery Fruit Cups

Ingredients:

  • Mixed fresh fruits (strawberries, blueberries, grapes, etc.)
  • Mini marshmallows
  • Clear plastic cups

Instructions:

  1. Layer mixed fresh fruits in clear plastic cups.
  2. Top with mini marshmallows to add some fun and contrast.
  3. Serve with small plastic spoons for easy eating.

6. Telescope Twists

Ingredients:

  • Pretzel rods
  • White chocolate chips or candy melts
  • Colorful sprinkles

Instructions:

  1. Melt the white chocolate chips or candy melts according to the package instructions.
  2. Dip half of each pretzel rod into the melted chocolate.
  3. Immediately sprinkle colorful sprinkles on the chocolate-dipped end.
  4. Let the pretzels cool on a sheet of wax paper until the chocolate hardens.

These snack ideas not only align with the “Magnified” theme but are also sure to delight the children attending Lifeways VBS 2025. Enjoy these delicious and creative treats!

Filed Under: Uncategorized

Lifeway VBS “Magnified” Day 1: God Created Everything and Wants to Spend Time with Me

June 10, 2024 by rautry

Welcome to the first day of Lifeway VBS “Magnified”! Today, we’re diving into an incredible truth: God created everything there is, and yet, He still wants to spend time with each one of us. This lesson is anchored in the Bible, with a focus on the verses from John 1:1-3,12 and Mark 10:13-16.

Lifeway VBS “Magnified” Day 1: Bible Verses

John 1:1-3, 12

In the beginning was the Word, and the Word was with God, and the Word was God. He was with God in the beginning. Through Him all things were made; without Him nothing was made that has been made… Yet to all who did receive Him, to those who believed in His name, He gave the right to become children of God.

Mark 10:13-16

People were bringing little children to Jesus for Him to place His hands on them, but the disciples rebuked them. When Jesus saw this, He was indignant. He said to them, “Let the little children come to me, and do not hinder them, for the kingdom of God belongs to such as these. Truly I tell you, anyone who will not receive the kingdom of God like a little child will never enter it.” And he took the children in his arms, placed his hands on them and blessed them.

Lifeway VBS “Magnified” Day 1: Lesson Highlights

God the Creator

From the very beginning, we see that God is the creator of everything. John 1:1-3 emphasizes that through Jesus, all things were made. This means that the stars, the oceans, the mountains, and all living creatures came into being through Him. It’s amazing to think about the vastness of God’s creation and how intricately everything has been designed.

God’s Personal Love

Despite the grand scale of His creation, God is deeply interested in each one of us. John 1:12 tells us that those who receive Him and believe in His name are given the right to become children of God. This means that God wants a personal relationship with us. He wants to spend time with us, listen to us, and help us grow.

Jesus Welcoming the Children

The story of Jesus and the children in Mark 10:13-16 beautifully illustrates God’s heart for us. Jesus’ disciples tried to prevent the children from coming to Him, but Jesus insisted they come. This shows that God’s love is inclusive and He values everyone, especially the smallest and seemingly least important. Jesus took the children in His arms, blessed them, and showed them great love and care.

Lifeway VBS “Magnified” Day 1: Take Away

As we begin our VBS journey, let’s remember that we are special to God. He created the entire universe, yet He still desires to be close to us. Let’s open our hearts to Him, spend time in prayer, and reflect on His Word.

Activities

  • Creative Time: Draw a picture of something in God’s creation that amazes you.
  • Prayer Circle: Share something personal with the group and pray together, thanking God for His love and creation.
  • Bible Story Acting: Act out the story of Jesus welcoming the children to show how we are all special to Him.

Lifeway VBS “Magnified” Day 1: Reflection

Day 1 of “Magnified” reminds us that God, the Creator of everything, loves us and wants to be near us. Let’s carry this truth in our hearts as we continue to learn and grow together this week.

Remember, you are a valuable part of God’s amazing creation and He delights in spending time with you.

Filed Under: Uncategorized

Lifeway 2025 VBS Theme Announced

June 4, 2024 by rautry

Announcing Lifeway’s 2025 VBS Theme: “Magnified” – Psalms 34:3

Greetings to all VBS leaders, volunteers, parents, and church family members!

We are thrilled that Lifeway announced the Vacation Bible School (VBS) theme for 2025: “Magnified” inspired by Psalms 34:3 – “Oh, magnify the Lord with me, and let us exalt his name together!”

Embracing the Theme: “Magnified”

The theme “Magnified” invites children and adults alike to see and experience the greatness of our God in every aspect of their lives. Just as a magnifying glass enlarges our view of tiny details, this VBS will help us focus on the incredible wonders of God’s character, His creation, and His work in our lives. Through engaging lessons, lively music, exciting activities, and meaningful worship, we will explore how to exalt and glorify the Lord together.

Psalms 34:3 – A Call to Worship

Psalms 34:3 serves as a powerful reminder of the importance of community in our worship. This verse encourages us to come together to praise and lift up the name of the Lord. It’s a call to unity and collective adoration, reflecting the core of what VBS is all about – bringing people together to grow in faith, share the gospel, and celebrate God’s love.

What to Expect from VBS Magnified 2025

1. Bible Stories and Lessons

Each day of VBS will delve into different stories and passages from the Bible that highlight the majesty of God. Children will learn about God’s mighty acts, His love, and His promises. These stories are chosen to inspire awe and deepen their understanding of who God is.

2. Creative Crafts

Crafts are a beloved part of VBS, and this year’s theme offers wonderful opportunities for creativity. Kids will create projects that reflect the beauty and greatness of God’s creation, reinforcing the daily lessons and providing keepsakes to remember their experience.

3. Dynamic Music and Worship

Music is a key element of VBS, and the “Magnified” theme will feature energetic and worshipful songs that echo the theme of magnifying the Lord. Kids will enjoy singing, dancing, and learning through music that speaks to their hearts and minds.

4. Interactive Activities and Games

Fun and interactive activities will keep the energy high and help solidify the day’s teachings. Games, challenges, and team-building exercises will emphasize the themes of unity and exaltation, encouraging kids to work together and support one another.

5. Mission Focus

Each year, VBS includes a mission component to teach children the importance of serving others. This year’s mission projects will focus on ways to spread the message of God’s greatness and love in our communities and beyond.

Start planning your 2025 VBS Magnified

As we prepare for “Magnified,” we invite you to pray for the success of this VBS program. Pray for the children who will attend, the volunteers who will lead, and the communities that will be impacted. May this theme inspire all of us to truly magnify the Lord and exalt His name together.

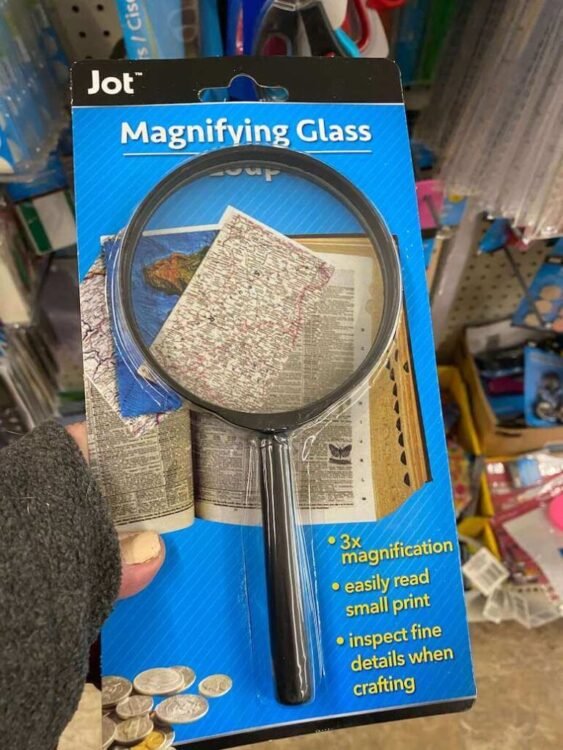
Get those magnified glasses ready! Dollar Tree has magnifying glasses.

“Oh, magnify the Lord with me, and let us exalt his name together!” – Psalms 34:3

Filed Under: Vacation Bible School

Galentines Decor from Dollar Tree

February 2, 2024 by rautry

Creating Galentine’s Day decor on a budget with items from Dollar Tree can be a fun and creative project. Here are some ideas for Galentine’s Day decorations using affordable items from Dollar Tree:

  1. Heart Banner:
    • Purchase heart-shaped cutouts or foam hearts from Dollar Tree.
    • String them together with twine or ribbon to create a cute heart banner.
    • You can also personalize the hearts with messages or use them as a backdrop for photos.
  2. Floral Arrangements:
    • Buy artificial flowers, vases, and floral foam from Dollar Tree.
    • Create your own floral arrangements for centerpieces or table decorations.
    • Mix and match different flower varieties and colors to suit the Galentine’s Day theme.
  3. Candle Holders:
    • Purchase glass candle holders or votive holders from Dollar Tree.
    • Decorate them with heart-shaped stickers or paint for a festive touch.
    • Place tealight or votive candles inside for a cozy atmosphere.
  4. DIY Photo Booth Props:
    • Get creative with foam sheets, markers, and sticks from Dollar Tree.
    • Cut out fun shapes like lips, hearts, and glasses to create DIY photo booth props.
    • Your guests can use them for memorable Galentine’s Day photos.
  5. Tablecloth and Tableware:
    • Choose a festive tablecloth with heart patterns or in shades of pink and red.
    • Purchase coordinating plates, cups, and napkins for a cohesive look.
    • Mix and match items to create a charming and budget-friendly tablescape.
  6. DIY Wreath:
    • Buy a plain wreath form and silk flowers from Dollar Tree.
    • Attach the flowers to the wreath using hot glue to create a personalized Galentine’s Day wreath.
    • Add ribbon or bows for an extra touch.
  7. Message Board:
    • Purchase a small chalkboard or dry erase board from Dollar Tree.
    • Write empowering or uplifting messages for your Galentine’s Day celebration.
    • Display it prominently to inspire and spread positive vibes.
  8. Heart-Shaped Balloons:
    • Dollar Tree often carries heart-shaped balloons around Valentine’s Day.
    • Use these balloons to decorate your space or create balloon bouquets.
    • Add ribbons or streamers for an extra festive look.
  9. Glittery Garland:
    • Pick up glittery foam sheets or garland from Dollar Tree.
    • Cut out heart shapes and string them together to create a sparkling garland.
    • Hang it across doorways or along the walls for a touch of glamour.
  10. Sweet Treats Display:
    • Purchase inexpensive candy dishes or trays from Dollar Tree.
    • Fill them with Valentine’s Day candies, chocolates, or heart-shaped cookies.
    • Create a sweet treats display as both decor and a tasty treat for your Galentine’s gathering.

Remember to let your creativity shine, and don’t be afraid to mix and match items to suit your personal style and preferences. Decorating for Galentine’s Day on a budget can be both fun and fabulous!

Topic: Galentines Decor from Dollar Tree

Filed Under: Uncategorized

Designated zones for Successful Transitioning when moving with ADHD

February 2, 2024 by rautry

* Note this post contains affiliate links. This post is of my own opinions and should not be used as a medical diagnosis. The products and thoughts are of my own and used to assist me as a diagnosed ADHD’er as an adult.

Hey, fellow movers with ADHD! Ever been in that last-minute scramble when you’re desperately tossing your stuff into random bags just to clear the space and get the move done? If you’re nodding along like me, guess what? It doesn’t have to be that chaotic!

Moving can be a challenging process for individuals with ADHD (Attention Deficit Hyperactivity Disorder), as it involves a lot of organization and focus. Designating specific zones can help facilitate a successful transition by providing structure and reducing the overwhelming nature of the move.

Here are some suggested zones:

  1. Planning Zone:
    • Dedicate a specific area for creating a moving plan.
    • Use a whiteboard, planner, or digital tools to outline tasks and deadlines. A notebook will do and some colorful pens, I personal like these Flair pens.
    • Break down tasks into smaller, manageable steps to avoid feeling overwhelmed.
  2. Sorting Zone:
    • Create a space for sorting and decluttering belongings.
    • Use bins or labeled boxes for different categories (keep, donate, discard). Use masking tape and a sharpie to label your bins/boxes.
    • Set a timer for short sorting sessions to maintain focus. Remember you are not going to pack your entire home in one day. Take your time and start as soon as you know and do a little at a time. A successful move is going to require a great deal of time and organization.
  3. Packing Zone:
    • Designate an area for packing items. Get your self a bathroom caddy or one from Dollar Tree. It does not need to be top of the line. Add rolls of packaging tape, Scissors, Sharpie and some index cards and any other items you may use for packing such as the sandwich bags.
    • Use color-coded labels or markers for boxes to easily identify contents.
    • Pack in short, focused bursts with breaks in between. Make your self a schedule as to what area or room you want to focus on.
  4. Labeling Zone:
    • Have a designated spot for labeling boxes and creating an inventory.
    • Use clear and concise labels for easy identification during unpacking.
    • Number your boxes and keep a list of how many small, medium, large, etc. of your boxes.
  5. Break Zone:
    • Designate a space for breaks and relaxation.
    • Include activities that help with stress reduction and maintaining focus, such as reading or listening to calming music.
    • Stay hydrated, listen to podcasts or music as you sort and pack, it makes the time go faster.
  6. Routine Zone:
    • Establish a routine zone in the new living space. Label your areas and this will help those who live with you as well, have a place for everything.
    • Set up a consistent area for daily activities like meal preparation, work, and relaxation.
    • Maintain a structured routine to help with ADHD symptoms.
  7. Unpacking Zone:
    • Allocate an area specifically for unpacking. Have all your supplies ready at hand. Keep your shower caddy filled with scissors, trash bags and notecards or sticky notes.
    • Prioritize unpacking based on essential items for daily living. Check out my list of what I have found to be the essentials or emergency box items.
  8. Organization Zone:
    • Create a dedicated space for organizing belongings in the new home.
    • Utilize storage solutions that are visually accessible and easy to maintain. I prefer clear bins. Dollar Tree has many great clear containers to help you keep your items organized.
  9. Communication Zone:
    • Establish a central location for important documents related to the move. These items should include any closing items of your previous living area, new home appliance items, layout of each room that includes outlet placement, breaker box, phone jacks, thermostat, door bell, well, etc.
    • Keep a list of essential contacts, addresses, and important information easily accessible.
  10. Sensory Support Zone:
    • Consider a sensory-friendly area with familiar items to provide comfort during the transition.
    • Include items like favorite blankets, pillows, or soothing colors. Other items to include is your electronics, a favorite book, notebook to jot down your ideas as the come to mind.

Remember that flexibility is key, and adjustments can be made based on individual needs. It’s also helpful to involve support from friends, family, or professionals to ease the transition for someone with ADHD. I know the heart wrench feeling of having a scattered brain and I want to share with you what has helped me ease the chaos of moving with ADHD.

Filed Under: ADHD

ADHD Clutter Anxiety

January 26, 2024 by rautry

Living with ADHD brings its own set of challenges, and one often-overlooked struggle is the overwhelming anxiety that can arise from clutter. Below I will help those with ADHD clutter anxiety and provide practical strategies to help declutter your space, organize your mind, and help you stay calm. Lets implement effective coping mechanisms to work towards a clutter-free and anxiety-reduced life.

I am not a doctor, please consult a health professional. Everything listed below is what helped me and those I know who live with ADHD.

Section 1: Unveiling the Connection Between ADHD and Clutter Anxiety

Individuals with ADHD commonly experience difficulties in executive functions, which are cognitive processes responsible for managing and regulating various aspects of behavior. Here are some key aspects of the relationship between ADHD and disorganization:

  1. Executive Functioning Impairments:
    • ADHD is characterized by impairments in executive functions such as attention, working memory, and impulse control.
    • Executive functions play a crucial role in organizing, planning, initiating, and completing tasks. When these functions are impaired, individuals may struggle to maintain order in their surroundings.
  2. Difficulty with Time Management:
    • ADHD often involves challenges in estimating and managing time effectively. This difficulty can lead to procrastination, missed deadlines, and a sense of being overwhelmed.
    • Individuals may struggle to prioritize tasks, resulting in a lack of organization in daily activities.
  3. Impulsivity and Distraction:
    • Impulsivity, a common trait in ADHD, can lead to impromptu decision-making and haphazard approaches to tasks, contributing to disorganization.
    • Frequent distractions and difficulties in maintaining focus can result in incomplete projects and a cluttered environment.
  4. Problems with Prioritization:
    • ADHD can impact an individual’s ability to prioritize tasks based on importance. This may result in an accumulation of unfinished projects and a lack of organization in setting and achieving goals.
  5. Forgetfulness:
    • Forgetfulness is a common symptom of ADHD, affecting both short-term and long-term memory.
    • Forgetting to complete tasks, misplacing items, and neglecting responsibilities contribute to disorganization in both personal and professional aspects of life.
  6. Inconsistent Attention to Detail:
    • ADHD may lead to difficulties in sustaining attention to details, making it challenging to follow through on tasks that require meticulous organization.
    • Inconsistent attention can contribute to a lack of thoroughness in completing assignments or maintaining an organized space.
  7. Emotional Factors:
    • Emotional factors, such as frustration and anxiety, can be heightened in individuals with ADHD when faced with organizational challenges.
    • Emotional responses may further interfere with the ability to implement effective organizational strategies.
  8. Environmental Factors:
    • The physical environment can influence disorganization. Individuals with ADHD may struggle to maintain order in their surroundings, leading to clutter and chaos.

Section 2: The Impact of Clutter on Mental Health

Clutter isn’t just a physical manifestation; it significantly affects mental well-being.

  1. Increased Stress and Anxiety:
    • Clutter often creates a chaotic and overwhelming environment, leading to heightened stress and anxiety levels for individuals with ADHD.
    • The constant visual and sensory stimulation from a cluttered space can contribute to a sense of chaos, making it difficult for individuals to focus and relax.
  2. Reduced Ability to Focus:
    • Clutter can act as a constant distraction, diverting attention away from important tasks and activities.
    • Individuals with ADHD already struggle with maintaining focus, and a cluttered environment further hinders their ability to concentrate on specific tasks.
  3. Feelings of Overwhelm:
    • Clutter can trigger feelings of overwhelm, especially when individuals with ADHD have difficulty breaking down tasks into smaller, more manageable steps.
    • The prospect of organizing and decluttering may seem insurmountable, leading to a sense of helplessness.
  4. Impaired Executive Functioning:
    • Clutter can interfere with executive functions such as planning, organizing, and decision-making, which are already impaired in individuals with ADHD.
    • The inability to establish and maintain order in their surroundings can result in a cycle of disorganization and frustration.
  5. Negative Impact on Self-Esteem:
    • Living in a cluttered environment may contribute to feelings of inadequacy and a sense of failure.
    • Individuals with ADHD may internalize societal expectations regarding organization, leading to negative self-perception when they struggle to meet these standards.
  6. Difficulty Finding and Managing Possessions:
    • Clutter can make it challenging for individuals with ADHD to locate important items, contributing to a sense of disarray and frustration.
    • Misplacing belongings and struggling to maintain an organized space can lead to a constant cycle of searching and increased stress.
  7. Social Isolation:
    • The shame or embarrassment associated with a cluttered living space may lead individuals with ADHD to withdraw socially.
    • Fear of judgment or criticism from others can contribute to social isolation, impacting mental well-being.
  8. Impact on Daily Functioning:
    • Clutter can impede daily activities and routines, making it difficult for individuals with ADHD to navigate their living spaces effectively.
    • Disorganization may result in missed deadlines, forgotten appointments, and a general sense of chaos in daily life.

Section 3: Breaking Down the Barriers to Organization

Below are some strategies for individuals with ADHD face when attempting to maintain an organized lifestyle.

  1. Break Tasks into Smaller Steps:
    • Divide larger organizational tasks into smaller, more manageable steps. This makes the process less overwhelming and allows for a step-by-step approach.
  2. Use a Task Management System:
    • Implement a task management system, whether it’s a to-do list, a digital app, or a physical planner. Prioritize tasks and break them down into smaller, actionable items. I personally use index cards to write down my main topics and then break them into small achievable steps.
  3. Set Clear Goals:
    • Establish clear and specific goals for organization. Define what needs to be accomplished and set realistic deadlines for each task. This provides a roadmap for prioritization. Set a five minute timer and see how far or how much of a task you can accomplish in that amount of time. Start with small items.
  4. Create a Daily Routine:
    • Establishing a daily routine can provide structure and help prioritize tasks. Include specific times for organizing activities, making it a regular part of your schedule. Writing it down in order on a index card or sticky note and place it where it is visible for a couple of weeks. It takes time to establish a routine.
  5. Prioritize Based on Importance and Urgency:
    • Use the Eisenhower Matrix to categorize tasks based on their importance and urgency. Focus on tasks that are both important and urgent, and then gradually address others. I have used the A, B, C or 1, 2, 3 method. A or 1 being the most important task, and so on that C and 3 are not as urgent and could be put off for sometime if needed.
  6. Identify High-Impact Areas:
    • Identify key areas that, when organized, will have the most significant impact on your daily life. Prioritize these areas to create immediate positive changes. Don’t go to the junk drawer first. Go to something that affects you quickly like your closet or jewelry.
  7. Utilize Visual Cues:
    • Use visual cues, such as color-coded labels or sticky notes, to highlight priorities. This provides a visual reminder and makes it easier to identify important tasks. I personal like Flair Pens! I like colors and writing in different colors helps me see each task as an individual not a blob of a mess!
  8. Implement the Two-Minute Rule:
    • If a task takes less than two minutes to complete, do it immediately. This helps clear small tasks quickly, preventing them from accumulating and becoming overwhelming. Make sure to check mark or cross off your task as a visual helper that you have completed the task.
  9. Schedule Regular Breaks:
    • Breaks are essential for individuals with ADHD. Schedule short breaks between organizing tasks to avoid mental fatigue and maintain focus. I use 30 second brain breaks from mini dance parties, a yoga stretch, a quick drawing, reading a few pages of my current book, etc. It can be anything, take a break her and there.
  10. Delegate When Possible:
    • Don’t hesitate to delegate tasks when appropriate. Enlist the help of friends, family, or your kids to share the workload and make organization more manageable.
  11. Focus on Progress, Not Perfection:
    • Shift your mindset from perfectionism to progress. Understand that organization is an ongoing process, and the goal is improvement, not flawless execution. Take a before and after picture of your progress.
  12. Celebrate Achievements:
    • Acknowledge and celebrate small achievements in organization. Rewarding yourself for completing tasks can provide positive reinforcement and motivation. Yes giving yourself a sticker will be a great motivation.
  13. Set Realistic Expectations:
    • Be realistic about what you can accomplish in a given time frame. Setting achievable goals reduces the likelihood of feeling overwhelmed and increases the likelihood of success. Again start small, two minutes or five minutes.
  14. Seek Professional Support:
    • Consider working with a professional organizer or seeking guidance from a therapist or ADHD coach. They can provide personalized strategies and support tailored to your specific needs. Make sure to shop around and find one that fits what you need help with in your organization journey.
  15. Practice Mindfulness Techniques:
    • Incorporate mindfulness techniques to stay present and focused during organization tasks. Mindful awareness can improve decision-making and reduce feelings of being overwhelmed.

Congratulations! You’ve reached the end of our guide on ADHD clutter anxiety. Remember, the journey to a clutter-free life is a process, and small, consistent steps can lead to significant changes.

Filed Under: ADHD

Waves of Creativity: Lifeway’s VBS Inspired DIY Dollar Tree Dock Pilings

January 17, 2024 by rautry

When it comes to creating a captivating beach theme for Lifeway’s VBS Breaker Rock Beach, you don’t need to break the bank. In this tutorial, we’ll dive into the world of DIY Dollar Tree dock pilings, providing a step-by-step guide to bring waves of creativity to your VBS décor. Plus, we’ll explore budget-savvy ideas using pool noodles, nautical-looking rope, hot glue, contact paper, and brown packaging paper, ensuring a stunning transformation without breaking your budget.


Materials Needed:

  1. Pool Noodles:
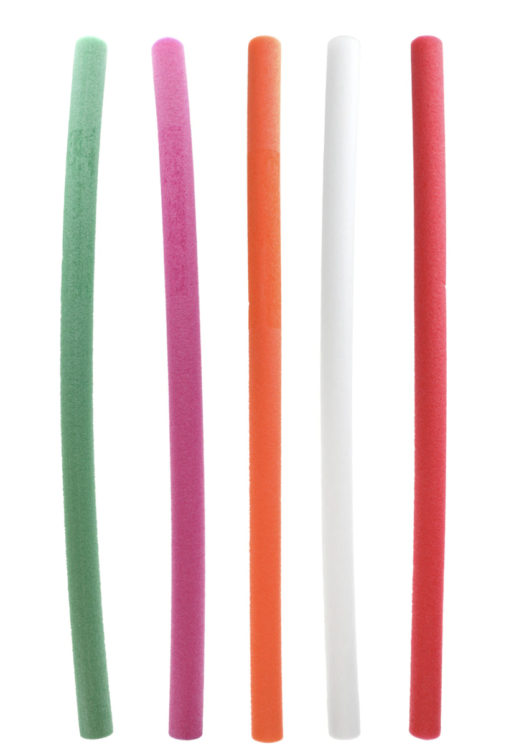
    • Affordable and versatile, pool noodles form the base of our dock pilings. Your choice of colors should lean towards the lighter colors that complement the beach theme, such as blue or white that are easier to cover with the contact paper or packaging paper.
    • %filemane%
  2. Nautical-Looking Rope:
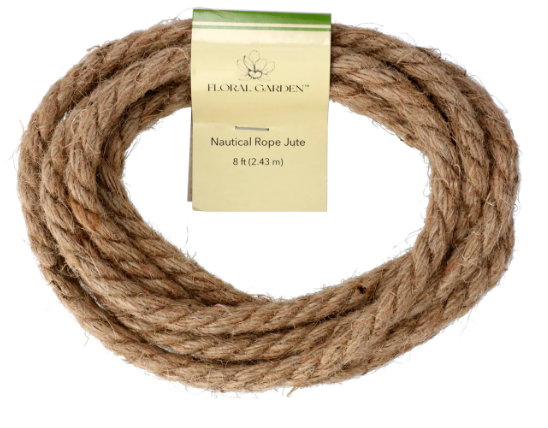
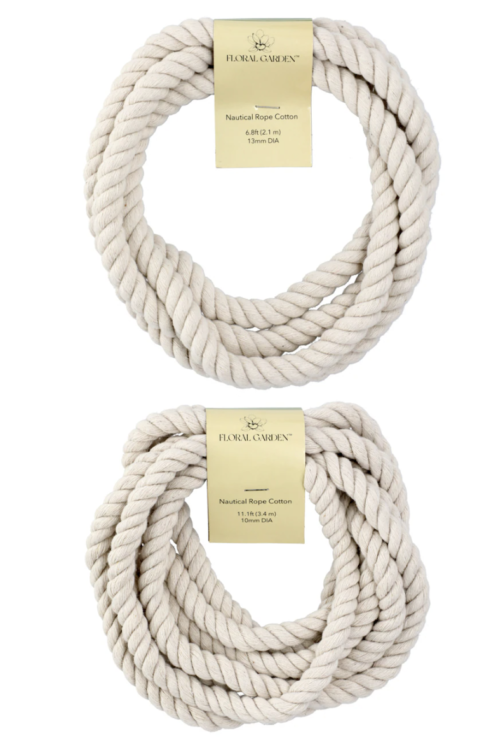
    • Dollar Tree offers two sizes of nautical-inspired ropes found in the garden section or craft section. Dollar Tree also offers Floral Garden Decorative Ropes. Select the option that best fits your overall theme choice for an authentic look.
    • %filemane% %filemane%
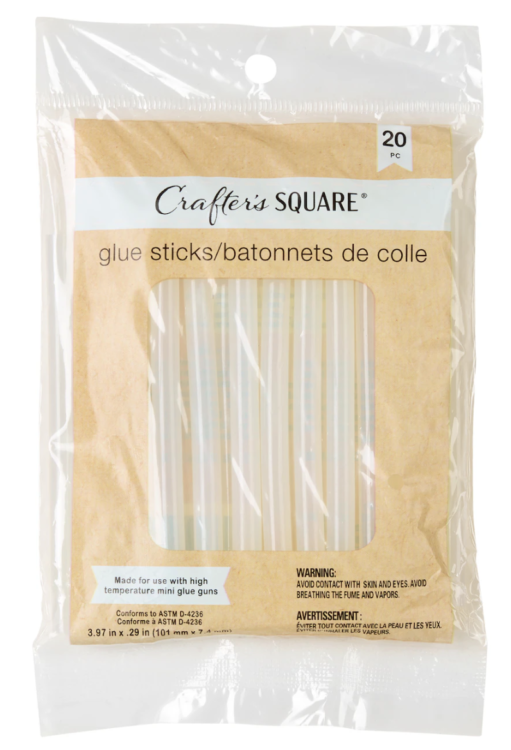
  3. Hot Glue Gun and Glue Sticks:
    • A crafting essential, the hot glue gun will be your best friend throughout this project. Ensure you have enough glue sticks for the entire process.%filemane%
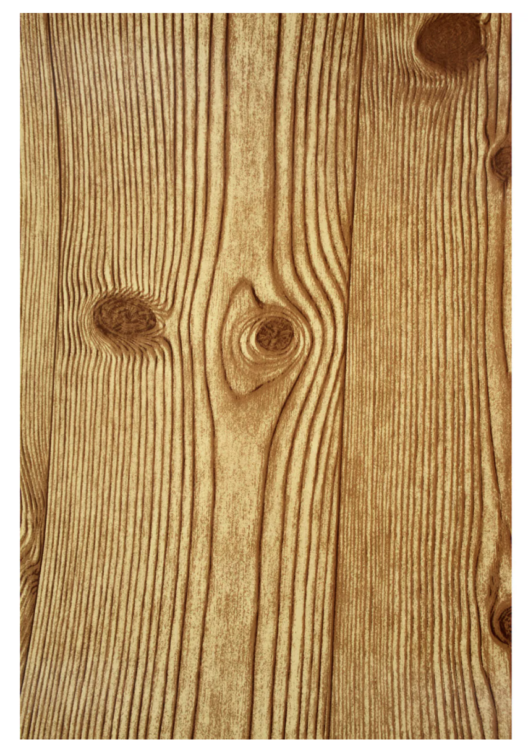
  4. Contact Paper:
    • Mimic the texture of weathered wood with contact paper. Opt for a brown or woodgrain pattern for an authentic appearance.%filemane%%filemane%
  5. Brown Packaging Paper:
    • This cost-effective material will add texture and depth to your dock pilings.

%filemane%

Step 1: Prepare the Pool Noodles

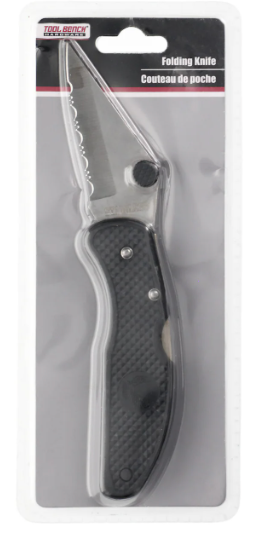
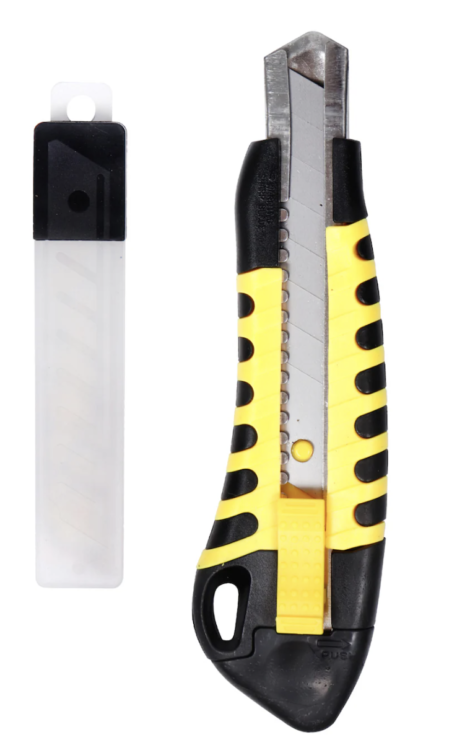
Start by cutting the pool noodles into your desired piling height. Consider varying heights to create a dynamic visual impact. A Tool Bench Camping Knife or Utility Knife work well for this task.

%filemane% %filemane%

Step 2: Wrap with Contact Paper

Measure and cut the contact paper to fit around each pool noodle. Wrap the contact paper around the noodle, securing it with hot glue. This step adds the appearance of weathered wood to your dock pilings.


Step 3: Create Texture with Brown Packaging Paper

Wrap brown packaging paper or use the Brown Wood contact paper to cover the pool noodle. Apply hot glue to the pool noodle and press the paper onto it to keep secure.


Step 4: Wrap with Nautical-Looking Rope

Using hot glue, attach the nautical-looking rope around the pool noodles, spiraling it from the bottom to the top. This step adds a touch of authenticity to your dock pilings.


Step 5: Secure Layers with Hot Glue

Ensure all layers—contact paper, brown packaging paper, and rope—are securely attached with hot glue. This not only enhances the appearance but also ensures the durability of your DIY dock pilings.


Step 6: Customize and Vary Heights

Create visual interest by customizing each piling. Vary the heights, add extra layers of contact paper or rope to some, and experiment with different textures to achieve a realistic, seaside look.


Budget-Savvy Tips:

  1. Dollar Tree Finds:
    • Dollar Tree is a treasure trove for affordable crafting materials. From pool noodles to rope, make the most of their budget-friendly selection when deciding to make your Vacation Bible School Decoration Ideas.
  2. Reuse and Recycle:
    • Get creative with brown packaging paper from your delivered packages. It not only adds texture with different types of paper but also repurposes materials you might already have.
  3. Buy in Bulk:
    • Purchase hot glue sticks and pool noodles in bulk to save on costs. These items are versatile and can be used for various crafting projects.
  4. Mix and Match:
    • Don’t be afraid to mix and match rope styles or experiment with different shades of contact paper. This adds character to your dock pilings without additional expense.


Transforming your VBS space into Lifeway’s Breaker Rock Beach doesn’t have to be a costly endeavor. With a bit of creativity and some budget-savvy choices, you can craft stunning DIY Dollar Tree dock pilings that capture the essence of the seaside. Enjoy the process, involve others in the crafting fun, and watch as waves of creativity wash over your VBS décor, leaving a lasting impression on all who attend.

Filed Under: Dollar Tree, Vacation Bible School

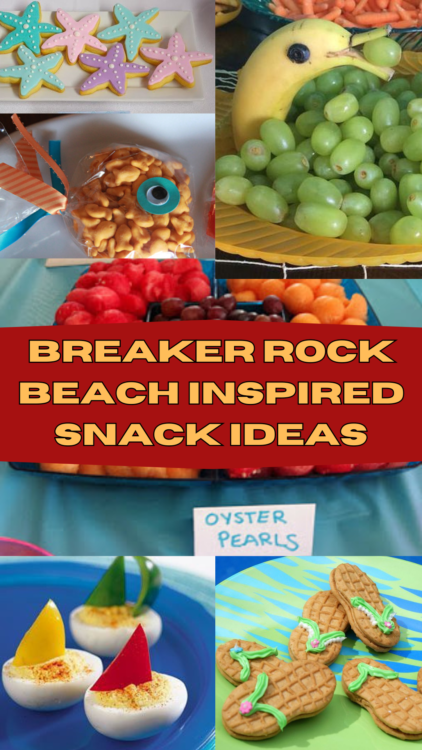
Dive into Fun: Breaker Rock Beach Snack Ideas for Lifeway’s Vacation Bible School

January 14, 2024 by rautry

Dive into Fun: Breaker Rock Beach Snack Ideas for Lifeway’s Vacation Bible School

Lifeway’s Vacation Bible School is a cherished tradition that brings together children, families, and communities in a spirit of faith and fellowship. As we embark on the exciting journey of Breaker Rock Beach-themed VBS, it’s time to add a splash of creativity to snack time. In this blog post, we’ll explore some delightful and easy-to-make snack ideas that perfectly complement the theme, making the VBS experience even more memorable for everyone involved.

1. Seashell Sandwiches

Transform ordinary sandwiches into delightful seashell-shaped treats. Use a seashell-shaped cookie cutter to cut sandwiches into playful forms. You can fill them with classic peanut butter and jelly or go for a more savory option with ham and cheese. The seashell sandwiches not only capture the essence of the beach theme but also make for a convenient and portable snack for the little ones.

2. Ocean Blue Fruit Cups

Create a refreshing snack by assembling Ocean Blue Fruit Cups. Use clear plastic cups to layer blue gelatin at the bottom, symbolizing the deep blue sea. Top it with a medley of colorful fruits like blueberries, grapes, and kiwi to represent the vibrant life found beneath the waves. These visually appealing fruit cups are not only delicious but also a healthy snack option for kids.

3. Sandcastle Rice Krispie Treats

Turn the beloved Rice Krispie treats into edible sandcastles. Mold the treats into castle shapes using a sandcastle-shaped mold or by hand. Use graham cracker crumbs to create the appearance of sandy exteriors. Add colorful candies or sprinkles to represent seashells or beach treasures. These whimsical Sandcastle Rice Krispie Treats will surely captivate the imagination of the young attendees.

4. Underwater Jello Cups

Craft an edible underwater scene with Underwater Jello Cups. Prepare blue Jello according to the package instructions and pour it into clear cups. Once set, add a layer of whipped cream to represent waves. Top it off with gummy fish or sea creature candies for a playful touch. These cups not only look adorable but also provide a tasty and thematic dessert option.

5. Beach Ball Cookies

Celebrate the joy of playing at the beach with Beach Ball Cookies. Use round sugar cookies as the base and decorate them with colorful icing to resemble beach balls. This snack idea allows for creativity and engagement, making it a perfect activity for kids during VBS. You can set up a decorating station with various icing colors and let the children unleash their artistic talents.

6. Starfish Sandwich Cookies

Take store-bought sandwich cookies and transform them into delightful starfish treats. Gently press five small candy orange slices around the edges of the sandwich cookies to create the appearance of starfish arms. These charming Starfish Sandwich Cookies are not only cute but also a simple and tasty addition to your Breaker Rock Beach snack spread.

7. Coral Reef Veggie Platter

Encourage healthy eating with a Coral Reef Veggie Platter. Arrange an assortment of colorful vegetables in a captivating coral reef display. Use cherry tomatoes, cucumber slices, baby carrots, and bell pepper strips to create a visually appealing and nutritious snack option. Serve it with a tasty dip, and watch as the kids dive into this vibrant veggie experience.

8. Surfboard Popsicles

Cool off with Surfboard Popsicles that are as fun to make as they are to eat. Create surfboard shapes using popsicle molds and fill them with fruit juice or flavored yogurt. Freeze until solid, and voila – you have surfboard-shaped popsicles ready to delight the kids on a warm summer day. You can even add colorful sprinkles for an extra burst of excitement.

9. Flip-Flop Cookies

Bring a touch of beach fashion to your snack table with Flip-Flop Cookies. Use Nutter Butter cookies as the base and decorate them with colorful icing to resemble flip-flops. You can add mini candy decorations or sprinkles to enhance the flip-flop design. These cookies are a delightful and thematic addition to your Breaker Rock Beach VBS snack offerings.

%filemane%

10. Tropical Smoothie Station

Set up a Tropical Smoothie Station for a refreshing and customizable snack experience. Provide a variety of fruits, yogurt, and juices for the children to create their own tropical smoothie combinations. You can even incorporate beach-themed names for the smoothie options, such as “Tropical Paradise Punch” or “Ocean Breeze Delight.”

A Feast of Fun and Faith

Lifeway’s Vacation Bible School at Breaker Rock Beach is not just a time of spiritual enrichment but also an opportunity for creative and joyful celebrations. These snack ideas add a playful and delicious dimension to the VBS experience, turning snack time into a feast of fun and faith. As children indulge in these beach-themed treats, they not only satisfy their taste buds but also deepen their connection to the theme, creating lasting memories of fellowship and enjoyment. So, let the snacking adventure begin as we dive into the sea of faith and imagination at Breaker Rock Beach VBS!

Filed Under: Vacation Bible School

Inspired Lifeway’s Breaker Rock Beach Worship Center Decorations

January 13, 2024 by rautry

Decoration Ideas for Lifeway’s Vacation Bible School Breaker Rock Beach Worship Center.

Vacation Bible School (VBS) is a wonderful opportunity for children to learn about the Bible and grow in their faith. Lifeway’s VBS themes are well-known for their creativity and engaging content. One popular theme from Lifeway is “Breaker Rock Beach,” which incorporates elements of adventure and faith. When planning your VBS decoration ideas for the worship center, it’s important to create an atmosphere that captures the essence of this theme. In this article, we will explore some creative decoration ideas to help you transform your worship center into a vibrant and exciting space for VBS.

  1. Entrance Decorations:

The entrance to the worship center sets the tone for the entire VBS experience. Create an eye-catching entrance by building a large archway adorned with colorful surfboards, sea creatures, and beach-themed decorations. Use vibrant colors such as blues, oranges, and yellows to create a visually appealing entrance that will instantly grab the attention of the children.

  1. Stage Decorations:

The stage is the focal point of the worship center, and it needs to be decorated in a way that reflects the theme. To bring the Breaker Rock Beach theme to life, consider building a large backdrop depicting a beach scene complete with crashing waves, palm trees, and a sandy beach. Add depth to the backdrop by using different materials such as cardboard or foam boards. Incorporate elements that represent the adventure aspect of the theme, such as a wooden boat or a treasure chest.

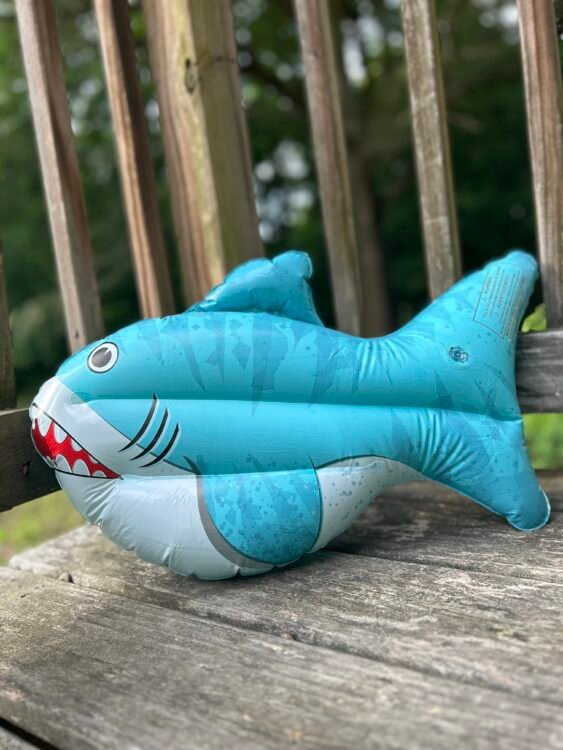
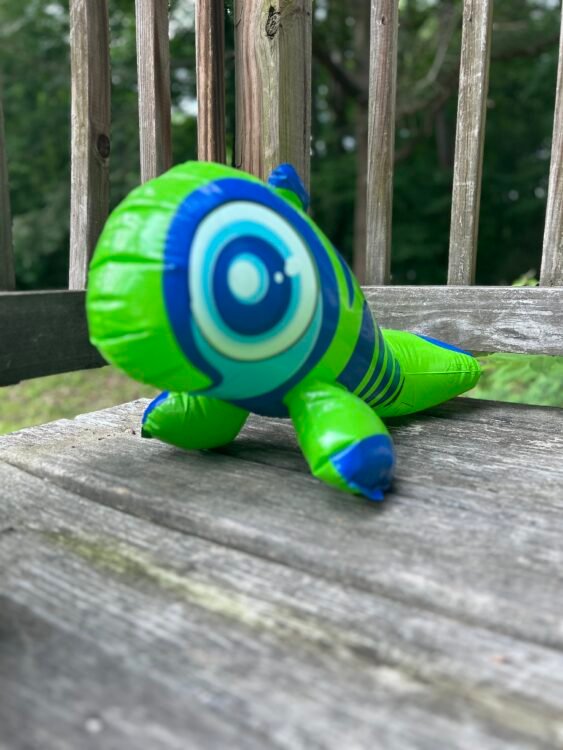
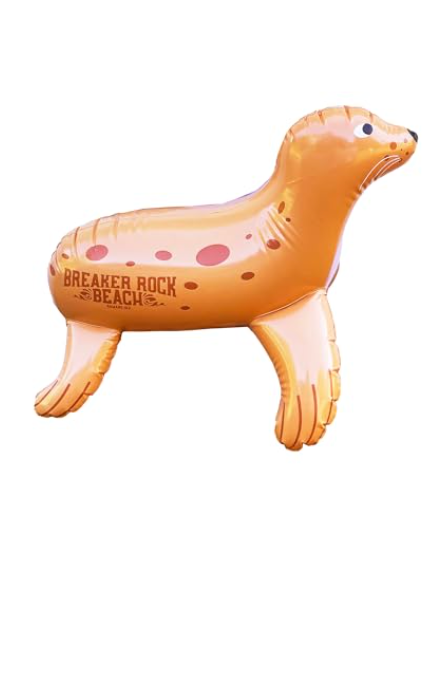
The following floatings were found at Dollar Tree. They may make for a fun 3D look to your worship stage.

  1. Lighting:

Proper lighting can enhance the overall atmosphere of the worship center. Use colored lighting, such as blues and purples, to create an underwater effect. String fairy lights and lanterns overhead to mimic the ambiance of a beach bonfire. Enhance the experience by using a spotlight on the stage to highlight speakers or performances.

  1. Seating Decorations:

Instead of traditional pews, consider using colorful beach towels or mats for seating arrangements. Scatter some beach balls and inflatable palm trees around the seating area to add a fun and playful touch. This will create an inviting and comfortable atmosphere for the children to enjoy throughout the VBS program.

  1. Wall Decorations:

Cover the walls of the worship center with beach-themed mural wallpaper or large posters featuring underwater scenes, tropical fish, and seashells. Position these decorations at eye level for the children to enjoy. Utilize wall decals or stencils to create beach-themed patterns or quotes from Bible verses that relate to the theme.

  1. Hanging Decorations:

To add dimension to the space, hang decorations from the ceiling. Hang large colorful paper lanterns or pom-poms to represent beach balls or floating bubbles. Attach fishnet to the ceiling and hang seashells, starfish, and other beach-themed ornaments from them. You can also suspend surfboards or miniature boats from the ceiling to further enhance the theme.

  1. Interactive Decorations:

Create interactive decorations that engage the children and encourage them to explore. Set up a small, sand-filled area for children to experience the sensation of playing in the sand. Place buckets, shovels, and beach toys nearby for added fun. Construct a life-size treasure chest filled with small prizes and let children take turns “unlocking” it. These interactive elements will keep the children engaged and excited about the theme.

  1. Stage Props:

Utilize various props on the stage to enhance the storytelling and teaching experience. Incorporate a wooden podium or pulpit, adorned with seashells and driftwood, as the focal point of the stage. Use beach-themed props such as surfboards, beach balls, and beach umbrellas to create a visually stimulating background. These props will help bring the Breaker Rock Beach theme to life and add depth to the worship center.

  1. Additional Touches:

To create a fully immersive experience, consider adding a soundtrack of ocean waves, seagull sounds, and tropical music to enhance the atmosphere. Install bubble machines to generate a whimsical effect that mimics bubbles rising from the sea. Use scented candles or air fresheners that smell like the ocean or tropical fruits to further enhance the sensory experience.

In conclusion, the Breaker Rock Beach theme for Lifeway’s Vacation Bible School is a fantastic opportunity to create an engaging and memorable experience for children attending the VBS program. By incorporating these decoration ideas into your worship center, you can transform the space into a vibrant and exciting environment that captures the essence of adventure and faith. Remember to keep safety in mind when implementing these ideas, ensuring that all decorations are securely fastened and do not pose any hazards. Enjoy the process of bringing the Breaker Rock Beach theme to life and creating a space where children can grow in their faith and have a truly unforgettable VBS experience.

Filed Under: Vacation Bible School

Inspired by Lifeway’s Breaker Rock Beach Decoration Ideas

January 13, 2024 by rautry

These ideas are inspired by Lifeway’s Vacation Bible School Theme Breaker Rock Beach Decoration Ideas. These are not affiliated with Lifeway or sponsored.

  1. Underwater Wonderland Entrance: Create an enchanting entrance with vibrant underwater scenes, using ocean-themed decorations like fish, corals, and seaweed.
  2. Seashell Garland: Craft garlands using seashells to hang around the venue, adding a beachy and natural touch to the decoration.
  3. DIY Surfboards: Use cardboard or foam boards to create colorful surfboards that can be placed around the venue. This adds a playful and fun element.
  4. Sandcastle Centerpieces: Create sandcastle centerpieces using buckets filled with sand and miniature flags. You can also add small beach toys for a whimsical touch.
  5. Tropical Flower Arrangements: Use tropical flowers like hibiscus and plumeria to create vibrant floral arrangements. These can be placed on tables or used as accents throughout the space.
  6. Nautical Banners: Design banners with nautical elements such as anchors, ropes, and ships. Hang them strategically to guide participants through different areas.
  7. Fishing Net Backdrops: Use fishing nets as backdrops for certain sections of the venue. Attach seashells, starfish, and small fish to the net for added decoration.
  8. Beach Ball Balloon Clusters: Create clusters of colorful beach ball balloons and place them at various points. This adds a festive and playful atmosphere.
  9. Lighthouse Decor: Incorporate lighthouse-themed decorations to symbolize guidance and illumination. Place them strategically to draw attention to specific areas.
  10. Sailboat Cutouts: Make sailboat cutouts from cardboard and paint them in bright colors. These can be hung from the ceiling or placed as standees around the venue.

Filed Under: Vacation Bible School

Next Page »

Products

  • Household Handbook Household Handbook: Your Complete Home Management Binder $21.99 Original price was: $21.99.$9.99Current price is: $9.99.
  • Princess Tiana Tiara Princess Tiana Tiara SVG $0.99
  • Shaun The Sheep SVG Shaun the Sheep SVG Invitation $0.99
  • Super Mario Invite Super Mario SVG Invitation $0.99
  • Minecraft Favor Bag Minecraft Creeper Invitation $0.99
try.hpinstantink.com/cmfvfj

Copyright © 2025 · Genesis Framework · WordPress · Log in