Rebecca Autry Creations
  • Home
  • Piñata’s
  • Vacation Bible School
  • Wedding
  • Courses
  • Store

Inspired Lifeway “Twists and Turns” Large Dice VBS Decoration Ideas

June 9, 2023 by rautry

How to Create Large Dice from Cardboard Boxes

Step into a world of adventure with Lifeways VBS Twists or Turns! Create excitement and engagement with our large cardboard dice. Crafted with care, these oversized dice will bring a touch of magic to your VBS experience. Perfect for interactive games, storytelling, and team challenges, these dice will add a twist of fun and unpredictability to every activity. Let your imagination roll and get ready for a thrilling journey like no other!

When it comes to adding a touch of creativity and excitement to your gaming nights or educational activities, nothing beats a set of oversized dice. Large dice are not only visually appealing but also provide an engaging and interactive experience. In this post, we’ll guide you through a step-by-step process of creating your very own large dice using cardboard boxes. So, gather your crafting materials and let’s get started!

This is an inspired decoration Idea for Lifeway’s “Twists and Turns” VBS 2023 theme.

Materials Needed to create Large Dice:

  1. Cardboard boxes (preferably thick and sturdy)
  2. Ruler or measuring tape
  3. Pencil
  4. Craft knife or scissors
  5. Acrylic paints or markers
  6. Paintbrushes
  7. Clear sealant (optional)
  8. Glue (preferably a strong adhesive)
  9. A template of dice faces (optional)

Step-by-Step Instructions:

  1. Measure and Mark: Begin by deciding on the size of your large dice. Use a ruler or measuring tape to determine the dimensions you desire. A typical size for large dice is around 12 inches per side, but you can adjust it to your preference. Mark the measurements on the cardboard using a pencil.
  2. Cut Out the Sides: Using a craft knife or scissors, carefully cut out the six sides of the dice from the cardboard. Ensure that each side is identical in size and shape. Take your time to achieve clean and precise cuts.
  3. Decorate the Faces: Now comes the fun part—decorating the dice faces. You can either create your own designs or find a printable template online for accurate dice faces. Using acrylic paints or markers, bring your creative ideas to life on each side of the dice. Allow the paint to dry completely before proceeding to the next step. You can cut our circles using a Circle SVG with your cutting machine.
  4. Assemble the Dice: Once the paint is dry, it’s time to assemble the dice. Apply glue to the edges of the cardboard pieces and carefully join them together, making sure they align perfectly. Press firmly and allow the glue to dry according to the manufacturer’s instructions. For added durability, you can reinforce the edges with extra strips of cardboard or use strong adhesive tape.
  5. Optional: Seal the Dice (Optional): To protect your beautiful artwork and enhance its longevity, consider applying a clear sealant over the painted surfaces. This step is optional but recommended, especially if you anticipate the dice being handled frequently.
  6. Enjoy the Fun: Your DIY large dice are now ready to be used! Whether it’s for educational purposes, board games, or even outdoor activities, these oversized dice will add an extra element of excitement. Roll them, use them for math games, or incorporate them into your favorite group activities.

Creating large dice from cardboard boxes is an enjoyable and budget-friendly craft project that can bring hours of fun to your gaming sessions or educational endeavors. By following these step-by-step instructions, you can easily craft your own oversized dice, personalize them with your unique designs, and unleash your creativity. So, gather your friends, family, or students and get ready for some unforgettable gaming experiences with your handmade dice!


Filed Under: Vacation Bible School

Day 1 – Lifeway Breaker Rock Beach VBS Inspired

June 8, 2023 by rautry

Below is inspired by Lifeway VBS Breaker Rock Beach Day 1 Bible story and is not the actual curriculum produced by them. This post is not affiliated or sponsored by Lifeway. The Bible story is from the ESV Bible Gateway version and is of my own interpretation and meant to be taught to middle school age students. Please use the following information as a guide.

%filemane%

Bible Story Title:
Satan Tricked Adam and Eve

Bible Story Reference:
Genesis 2–3

Bonus Verse:
Psalm 119:160

Some People Say:
Truth can be different for different people.

God Says:
Truth comes from Me.

Today’s Point:
Truth comes from God.

Kids Craft Ideas:

Apple Hand Tree:

Have kids trace their hand on a sheet of paper in the center of a paper of the tree. Have students color their trees. The arm part is the trunk of the tree.

Check out the items you should start collecting from Dollar Tree for your 2024 VBS

Bible Gateway ESV – Genesis 2 -3

The Seventh Day, God Rests

2 Thus the heavens and the earth were finished, and all the host of them. 2 And on the seventh day God finished his work that he had done, and he rested on the seventh day from all his work that he had done. 3 So God blessed the seventh day and made it holy, because on it God rested from all his work that he had done in creation.

The Creation of Man and Woman

4 These are the generations
of the heavens and the earth when they were created,
in the day that the Lord God made the earth and the heavens.

5 When no bush of the field was yet in the land and no small plant of the field had yet sprung up—for the Lord God had not caused it to rain on the land, and there was no man to work the ground, 6 and a mist[c] was going up from the land and was watering the whole face of the ground— 7 then the Lord God formed the man of dust from the ground and breathed into his nostrils the breath of life, and the man became a living creature. 8 And the Lord God planted a garden in Eden, in the east, and there he put the man whom he had formed. 9 And out of the ground the Lord God made to spring up every tree that is pleasant to the sight and good for food. The tree of life was in the midst of the garden, and the tree of the knowledge of good and evil.

10 A river flowed out of Eden to water the garden, and there it divided and became four rivers. 11 The name of the first is the Pishon. It is the one that flowed around the whole land of Havilah, where there is gold. 12 And the gold of that land is good; bdellium and onyx stone are there. 13 The name of the second river is the Gihon. It is the one that flowed around the whole land of Cush. 14 And the name of the third river is the Tigris, which flows east of Assyria. And the fourth river is the Euphrates.

15 The Lord God took the man and put him in the garden of Eden to work it and keep it. 16 And the Lord God commanded the man, saying, “You may surely eat of every tree of the garden, 17 but of the tree of the knowledge of good and evil you shall not eat, for in the day that you eat of it you shall surely die.”

18 Then the Lord God said, “It is not good that the man should be alone; I will make him a helper fit for him.” 19 Now out of the ground the Lord God had formed every beast of the field and every bird of the heavens and brought them to the man to see what he would call them. And whatever the man called every living creature, that was its name. 20 The man gave names to all livestock and to the birds of the heavens and to every beast of the field. But for Adam there was not found a helper fit for him. 21 So the Lord God caused a deep sleep to fall upon the man, and while he slept took one of his ribs and closed up its place with flesh. 22 And the rib that the Lord God had taken from the man he made into a woman and brought her to the man. 23 Then the man said,

“This at last is bone of my bones
    and flesh of my flesh;
she shall be called Woman,
    because she was taken out of Man.”

24 Therefore a man shall leave his father and his mother and hold fast to his wife, and they shall become one flesh. 25 And the man and his wife were both naked and were not ashamed.

The Fall

3 Now the serpent was more crafty than any other beast of the field that the Lord God had made.

He said to the woman, “Did God actually say, ‘You shall not eat of any tree in the garden’?” 2 And the woman said to the serpent, “We may eat of the fruit of the trees in the garden, 3 but God said, ‘You shall not eat of the fruit of the tree that is in the midst of the garden, neither shall you touch it, lest you die.’” 4 But the serpent said to the woman, “You will not surely die. 5 For God knows that when you eat of it your eyes will be opened, and you will be like God, knowing good and evil.” 6 So when the woman saw that the tree was good for food, and that it was a delight to the eyes, and that the tree was to be desired to make one wise, she took of its fruit and ate, and she also gave some to her husband who was with her, and he ate. 7 Then the eyes of both were opened, and they knew that they were naked. And they sewed fig leaves together and made themselves loincloths.

8 And they heard the sound of the Lord God walking in the garden in the cool of the day, and the man and his wife hid themselves from the presence of the Lord God among the trees of the garden. 9 But the Lord God called to the man and said to him, “Where are you?” 10 And he said, “I heard the sound of you in the garden, and I was afraid, because I was naked, and I hid myself.” 11 He said, “Who told you that you were naked? Have you eaten of the tree of which I commanded you not to eat?” 12 The man said, “The woman whom you gave to be with me, she gave me fruit of the tree, and I ate.” 13 Then the Lord God said to the woman, “What is this that you have done?” The woman said, “The serpent deceived me, and I ate.”

14 The Lord God said to the serpent,

“Because you have done this,
    cursed are you above all livestock
    and above all beasts of the field;
on your belly you shall go,
    and dust you shall eat
    all the days of your life.
15 I will put enmity between you and the woman,
    and between your offspring and her offspring;
he shall bruise your head,
    and you shall bruise his heel.”

16 To the woman he said,

“I will surely multiply your pain in childbearing;
    in pain you shall bring forth children.
Your desire shall be contrary to your husband,
    but he shall rule over you.”

17 And to Adam he said,

“Because you have listened to the voice of your wife
    and have eaten of the tree
of which I commanded you,
    ‘You shall not eat of it,’
cursed is the ground because of you;
    in pain you shall eat of it all the days of your life;
18 thorns and thistles it shall bring forth for you;
    and you shall eat the plants of the field.
19 By the sweat of your face
    you shall eat bread,
till you return to the ground,
    for out of it you were taken;
for you are dust,
    and to dust you shall return.”

20 The man called his wife’s name Eve, because she was the mother of all living. 21 And the Lord God made for Adam and for his wife garments of skins and clothed them.

22 Then the Lord God said, “Behold, the man has become like one of us in knowing good and evil. Now, lest he reach out his hand and take also of the tree of life and eat, and live forever—” 23 therefore the Lord God sent him out from the garden of Eden to work the ground from which he was taken. 24 He drove out the man, and at the east of the garden of Eden he placed the cherubim and a flaming sword that turned every way to guard the way to the tree of life.

For Lifeway’s official curriculum for 2024 VBS Breaker Rock Beach please visit Lifeway’s Website.

Topic: Day 1 – Lifeway Breaker Rock Beach VBS Inspired

Filed Under: Vacation Bible School

Lifeway VBS Breaker Rock Beach Inspired Decorations

June 7, 2023 by rautry

Here are the things you should be getting from Dollar Tree for next years 2024 Lifeway VBS Breaker Rock Beach.

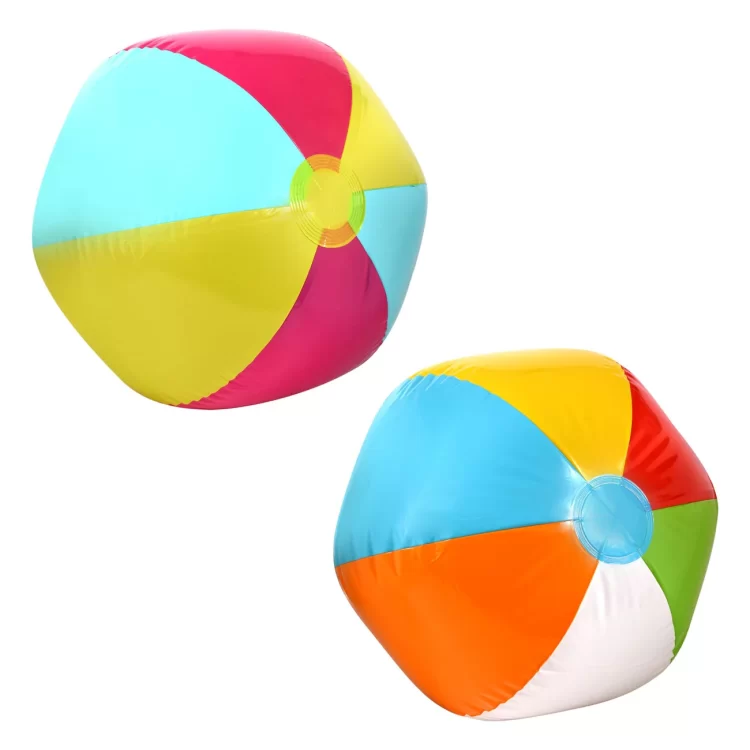
  1. Inflatable Beach Ball

You can get these smaller 20 inch inflatable Beach Balls from Dollar Tree in the spring when they bring out the summer products. You can find the giant 47 inch giant beach ball inflatables on Amazon great for Lifeways VBS Breaker Rock Beach Worship Center Decorations.

%filemane%

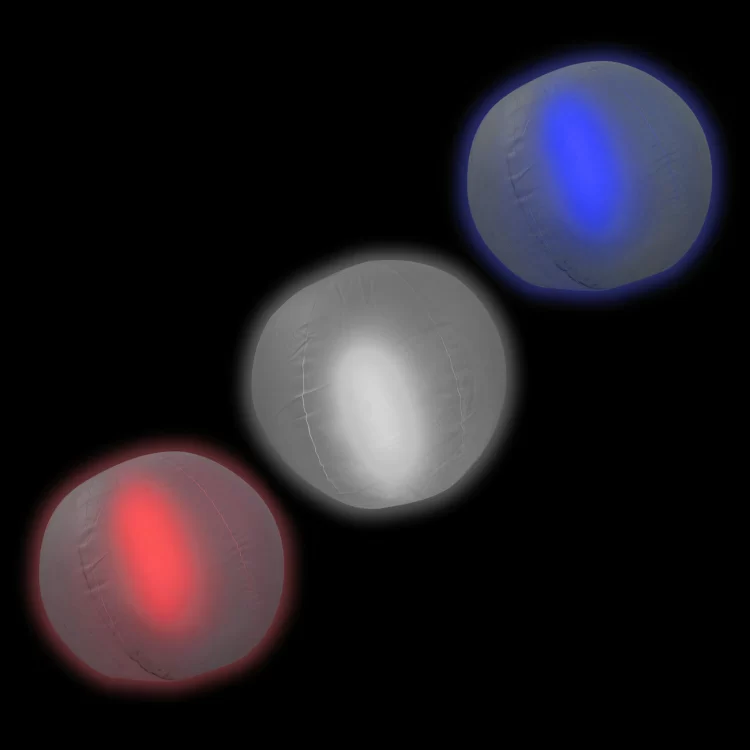
2. Glow in the Dark Inflatable Beach Balls

On Amazon you can get 24 pc Glow in the dark beach inflatables and LED Glass Glow in the dark.

%filemane%

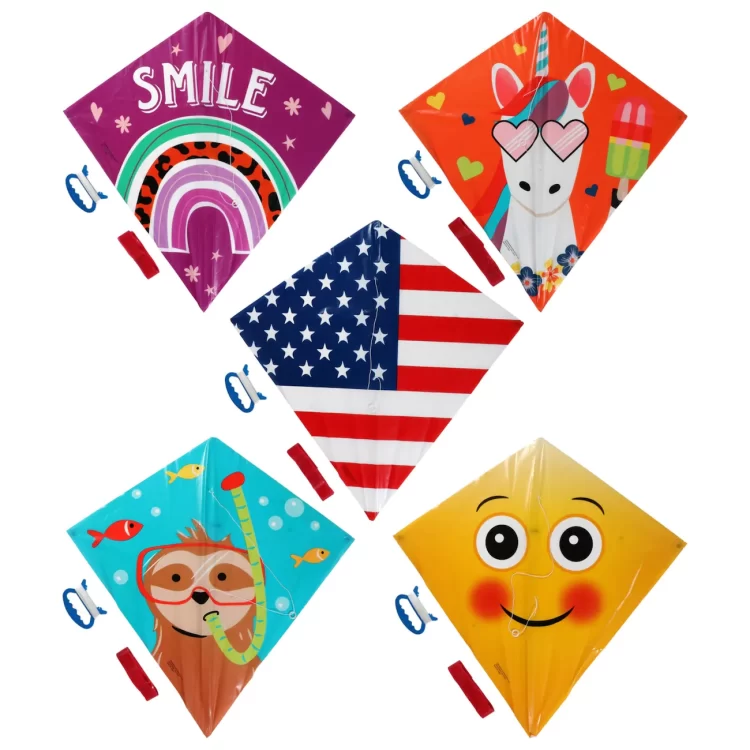
3. Kites

Dollar Tree has many different types of Kites to choose from to help assist you with your Decoration ideas for Breaker Rock Beach.

%filemane%

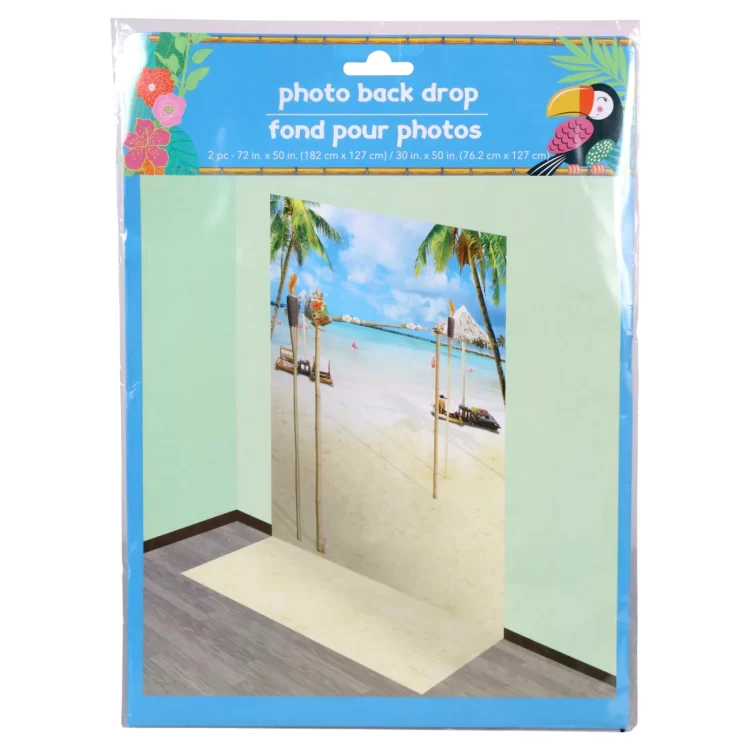
4. Beach Luau Backdrop

%filemane%

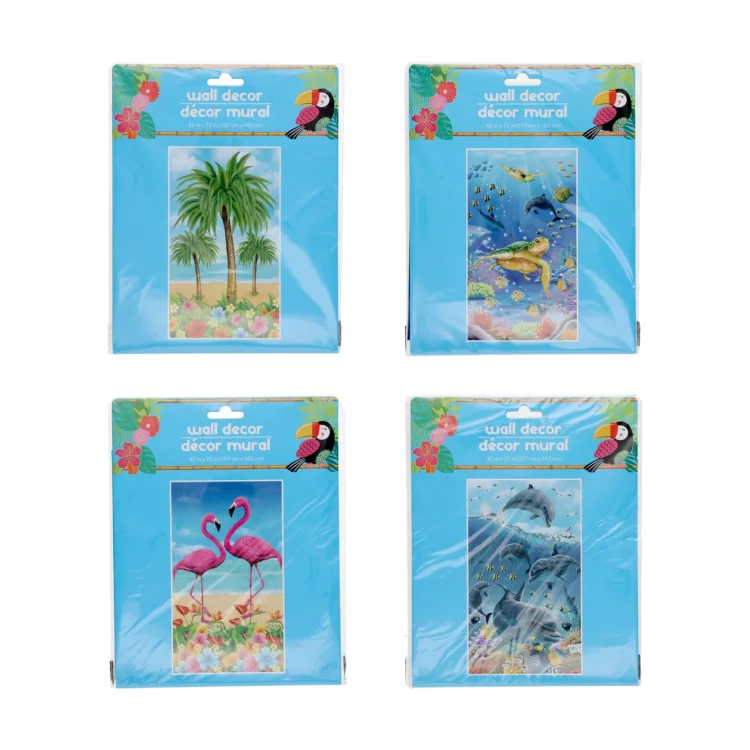
5. Summer Beach Wall Murals

%filemane%

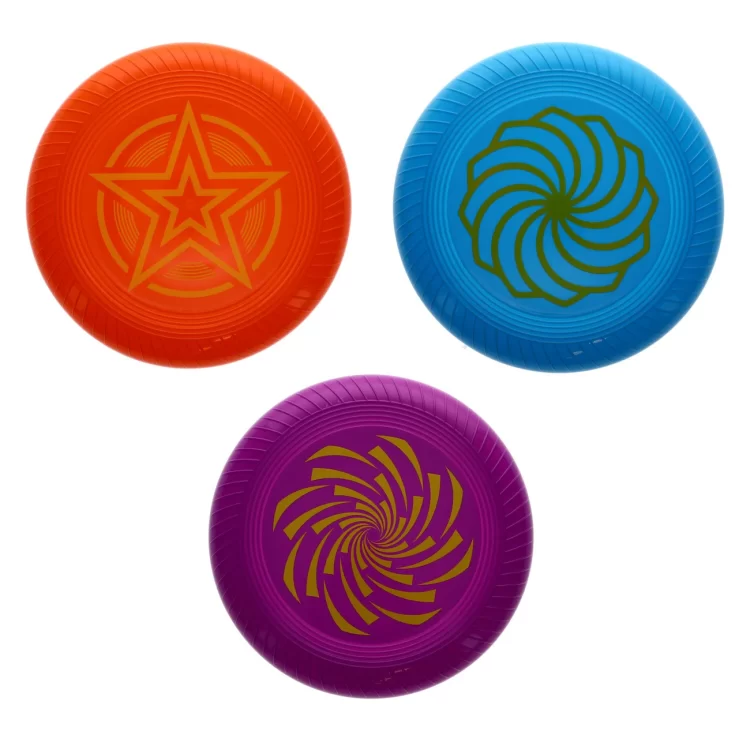
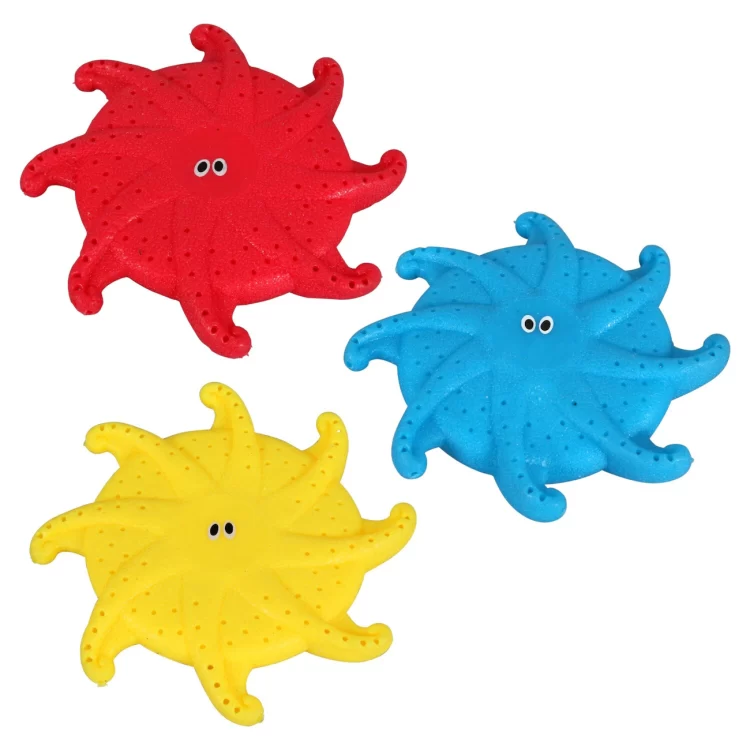
6. Frisbee/Flying Disks

%filemane%

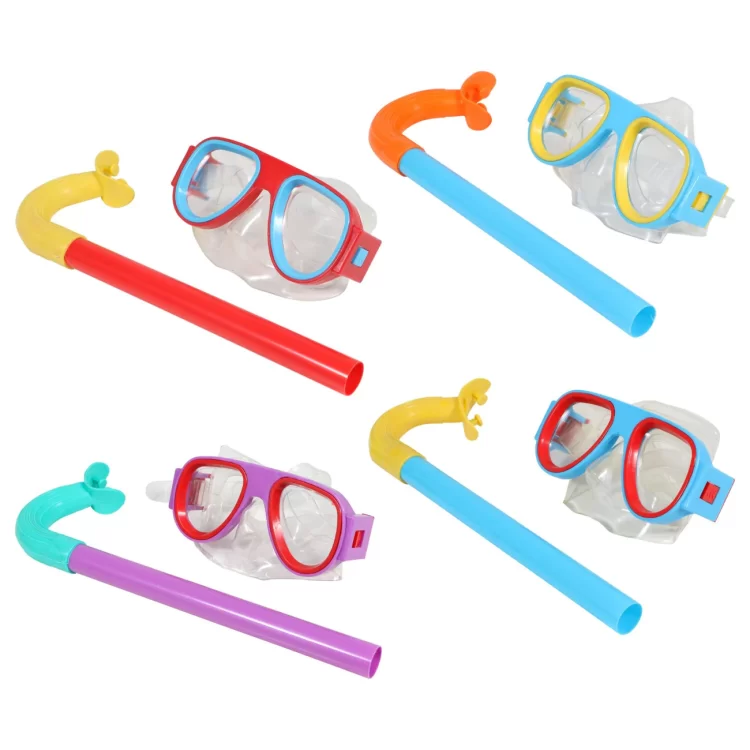
7. Snorkles

%filemane%

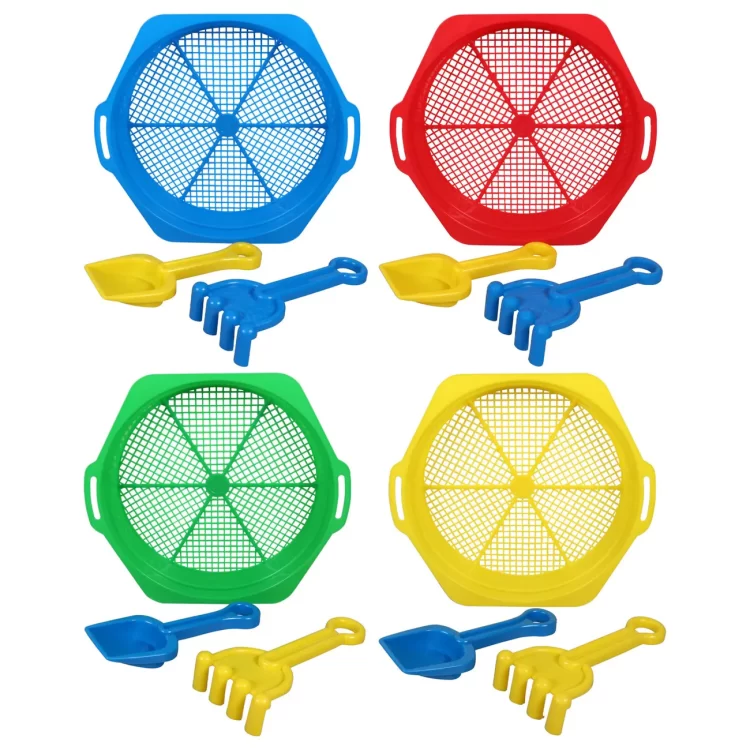
8. Plastic Sand Sifters

%filemane%
  1. Summer Mesh Totes
  2. Water Disks
%filemane%

Bonus

  1. Sand Buckets
  2. Shovels
  3. Windup Pool Toys
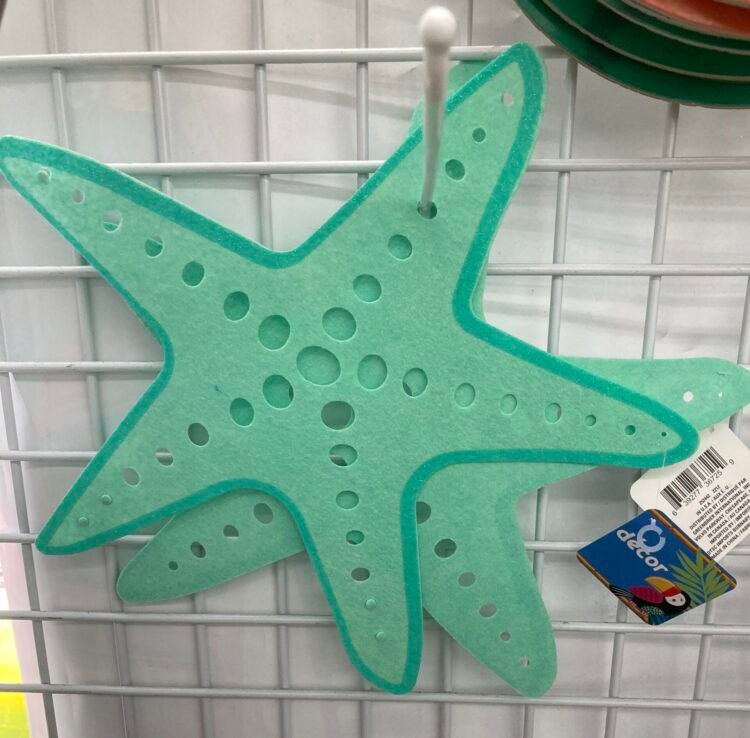
  4. Shell or Starfish Wall Decor
%filemane%

Lifeway has their decorations available for purchase on amazon including those below to be a few.

Breaker Rock Super Duper Backdrop

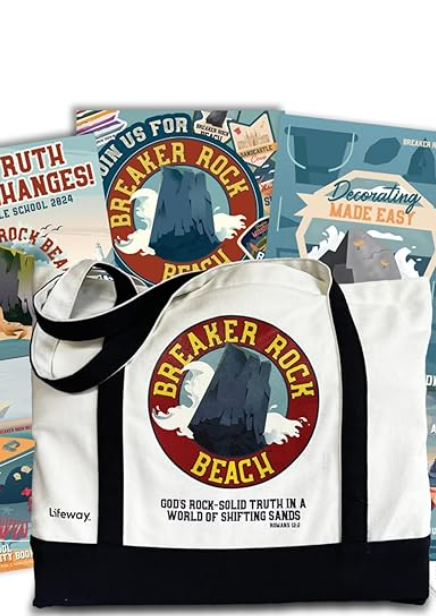
Breaker Rock Beach Directors Kit

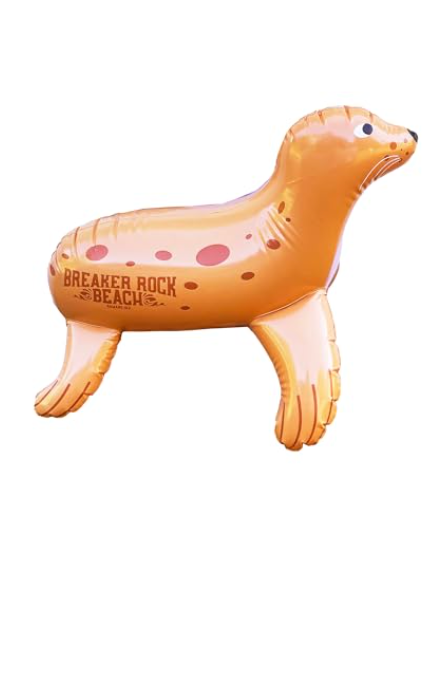
Breaker Rock Inflatable Sea Lion

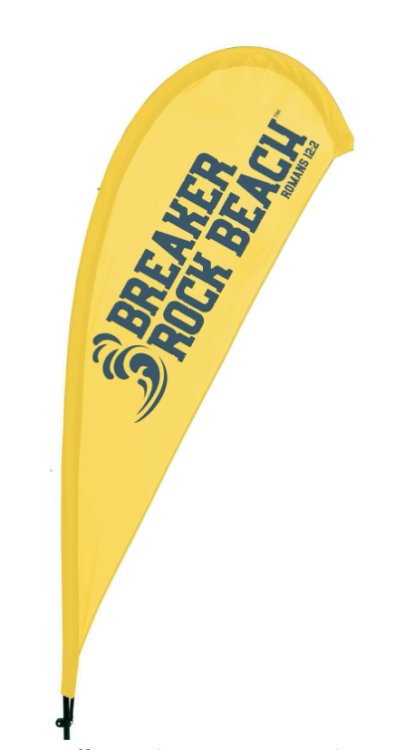
Breaker Rock Beach Theme Flying Banner

Filed Under: Vacation Bible School

Twists and Turns Dollar Tree Decoration Ideas

April 8, 2023 by rautry

Make Giant playing pieces!

Table top Player pieces

Materials Need for Table Top Player Pieces

  • Orange Playground Cones, 2pk
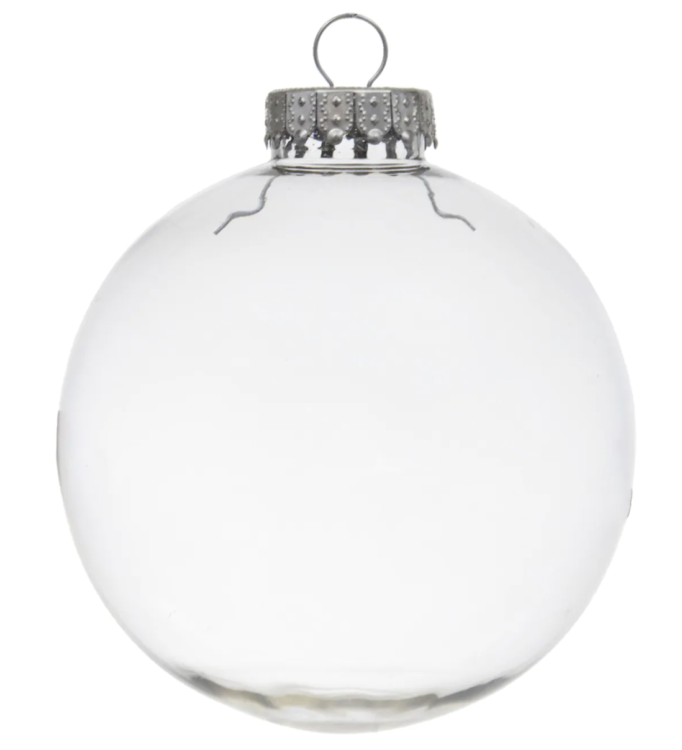
  • Small Toy ball or plastic Christmas ornament
  • Hot glue and Glue gun
  • Paint – Varying Primary colors or Primary Color Spray paint
%filemane%
%filemane%

Instructions:

  1. Take a toy ball and place it on top of a caution cone. The ball should fit snugly on top of the cone.
  2. Use a marker to trace around the ball where it meets the cone. This will give you a guide for where to cut.
  3. Using a pair of scissors, cut off the top of the cone along the line you just traced.
  4. Repeat this process with as many cones and balls as you need for your game.
  5. Make sure the ball stays securely on top of the cone by using hot glue to secure the ball on the cone.
  6. Take your desired primary color paint and paint the entire player piece you created. This may take multiple coats. A Faster alternative is to get a primary color spray paint and cover the entire game piece.

Twists and Turns Giant Dice

Materials Needed for Giant Dice:

  • Large Cardboard boxes
  • Scissors
  • Duck Tape/Hot glue and glue gun
  • White Wrapping Paper
  • Black Sharpie or Poster Marker or Black Construction paper

Instructions:

Take 6 pieces of cardboard cut into your desired size. 12 x 12 inches will make a decent large dice. Using a hot glue gun or duck tape, combine the sides to make a cube. You can paint (Cardboard soaks up paint and takes a substantial time to dry) or get white wrapping paper from Dollar Tree and cover all sides. Then grad a Black sharpie or Black poster marker from Dollar Tree and draw on your circles from 1 – 6. You can also cut out black circles from construction paper also found at dollar tree and glue on the dots.

Twists and Turns Giant Playing Cards

%filemane%

Materials Needed for Twists and Turns Giant Playing Cards

  • Cardboard
  • Copy paper
  • printer
  • White/Black paint (Optional)
  • Glue stick
  • Box Cutter or scissors

Instructions to make Twists and Turns Giant Playing Cards

Print out the Twists and Turns Giant Playing Card pdfs found here. Using a glue stick attach the paper to your cardboard and cut to shape. Completely optional but painting the sides and back of the card either white or black will give your Twists and Turns Giant Playing Cards the finishing touch.

Filed Under: Vacation Bible School

Inspired Lifeway “Twists and Turns” VBS Decoration Ideas

April 8, 2023 by rautry

Day 1: Jesus is holy. Bible story: Peter followed Jesus.
Day 2: Jesus is trustworthy. Bible story: Peter walked to Jesus on the water.
Day 3: Jesus is forgiving. Bible story: Peter denied Jesus and was restored.
Day 4: Jesus is worth following. Bible story: Peter spoke boldly about Jesus.
Day 5: Jesus is for everyone. Peter told Cornelius about Jesus.

As kids will follow along Peter for the week using board games to video games, below you will find some inexpensive decoration ideas.

Lifeways Vacation Bible School (VBS) is an exciting time of the year for both children and adults. This year, the theme is “Twists and Turns,” which means there are plenty of creative decoration ideas that can be done inexpensively. Here are some ideas to get started:

  1. Use Streamers: One of the easiest and most cost-effective ways to decorate for VBS is to use streamers. You can buy them in various colors and lengths and drape them around the room to add a festive touch. You can even twist them together to create fun designs and patterns.
  2. Make Paper Chains: Another easy and inexpensive way to decorate is by making paper chains. You can use construction paper in various colors and cut them into strips. Then, simply loop each strip around the previous one and secure with glue or tape. You can hang them from the ceiling or drape them around the room.
  3. Create a Backdrop: If you have a large wall in your VBS room, consider creating a backdrop. You can use inexpensive plastic tablecloths in various colors and cut them into strips. Then, twist and knot the strips together to create a textured and colorful background.
  4. Hang Balloons: Balloons are a classic decoration for any celebration, and they are relatively inexpensive. You can buy balloons in various colors and sizes and hang them from the ceiling or create balloon bouquets for the tables.
  5. Use Posters: Another inexpensive way to decorate is by using posters. You can buy posters with the VBS theme or create your own with paper and markers. You can hang them on the walls or prop them up on easels.
  6. Make a Paper Lantern: Paper lanterns are easy to make and can add a fun and colorful touch to your VBS room. You can use tissue paper in various colors and cut it into strips. Then, twist and glue the strips together to create a lantern shape. You can even add a battery-operated tea light inside to create a soft glow.
  7. Create a Photo Booth: Kids love taking photos, so why not create a photo booth for them to pose in? You can use a colorful sheet or tablecloth as the backdrop and add props like hats, glasses, and signs.

These are just a few inexpensive decoration ideas for Lifeways Vacation Bible School “Twists and Turns” theme. With a little creativity and some basic supplies, you can create a fun and festive atmosphere for your VBS event.

Check out – Twists and Turns Dollar Tree Decoration Ideas

%filemane%

Topic: Inspired Lifeway “Twists and Turns” VBS Decoration Ideas

Filed Under: Vacation Bible School

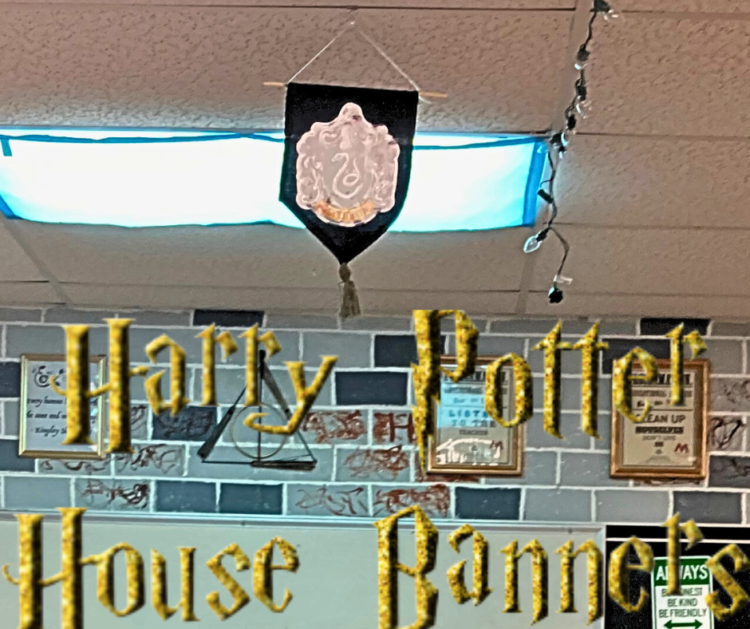
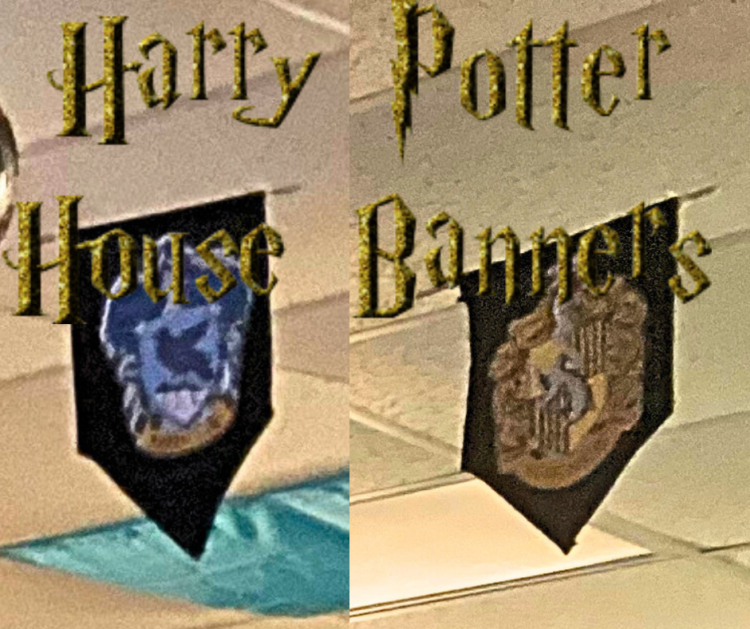
Harry Potter House Banners Tutorial

April 7, 2023 by rautry

Creating Harry Potter house banners can be a fun and creative way to decorate your space, whether it’s for a Harry Potter themed party or just to show off your love for the series. Here is a tutorial on how to make your own Harry Potter house banners:

Collect your materials to create your own Harry Potter House Banners

%filemane%

Materials:

  • Four pieces of fabric in the colors of the four Hogwarts houses (Gryffindor: red and gold; Hufflepuff: yellow and black; Ravenclaw: blue and silver; Slytherin: green and silver) or black like the ones I created.
  • Iron-on transfer paper or Cardstock and laminator, lamination sheets
  • Scissors
  • Printer
  • Iron or Hot glue
  • Twine or ribbon or yarn in red, yellow, blue and green
  • Sewing machine or needle and thread
  • Dowel Rods
  • Fishing Wire
%filemane%

Follow below to create Harry Potter House Banners.

Instructions:

  1. Begin by measuring the size of the banners you want to make. Cut the fabric pieces to your desired size. A standard size for a banner is around 12 inches wide by 18 inches long, but you can adjust the size to your liking. I folded mine in half to create a triangle bottom.
  2. Using a computer, find the house crest images for each of the four Hogwarts houses. Resize them to fit on your banners, and print them out onto the iron-on transfer paper or cardstock. If you are printing on cardstock I recommend laminating the house crests and then cut. Make sure to cut two of each, one or each side of the banners.
  3. Cut around each of the crests, leaving a small border of transfer paper around the edge. If you printed on cardstock make sure to cut as close to the edges as possible.
  4. Following the instructions on the transfer paper package, iron each crest onto the corresponding color fabric piece. If you laminated the house crests then hot glue them to the banners.
  5. Once the crests have been transferred onto the fabric, trim any excess transfer paper from the edges.
  6. Cut a small slit at the top of each banner to thread the twine or ribbon through. Fold over the top edge of the banner about 1 inch and sew it down to create a pocket for the twine/ribbon. Alternative: Fold over the top edge of the banner and sew across to make a pocket for the dowel rod to pass through. Place the dowel and glue around the ends of the banner on each side so the banner does not slide.
  7. Thread the fishing wire, twine or ribbon through each banner and tie a knot at each end to create a hanger.
  8. Hang your banners on a wall, above a doorway, or wherever you choose to display them. Enjoy your Harry Potter house banners!

My banners are hung in my classroom above the tables for each house. I have a grid ceiling and used a paper clip attached to the fishing wire and slid them on the metal frame.

Optional: You can also add additional embellishments to your banners, such as gold tassels or fringed edges. I used yarn from Dollar Tree in the colors of red, blue, green and yellow corresponding to the house banner and hot glued them to the edges of the banners. Use your imagination and have fun with it!

Be sure to check out other Harry Potter Classroom

Topic: Harry Potter House Banners Tutorial

Filed Under: Classroom, Harry Potter Tagged With: #Banners, #ClassroomDecorations, #DIY, #HarryPotter, #HouseBanners

Harry Potter Classroom Decorations

April 6, 2023 by rautry

Looking to transform your classroom into a magical world of wizardry and enchantment? Look no further than our Harry Potter classroom decoration ideas! From posters featuring your favorite characters and spells to themed bulletin boards and door decorations, we have everything you need to create a Hogwarts-inspired learning environment. Get ready to cast a spell on your students with our Harry Potter classroom decorations!

  1. Entering the world of Wizarding Magic

I used a “Welcome” image I found on google and created an SVG file to cut on my Cameo Silhouette.

If you’re a Harry Potter fan and a teacher, there’s no better way to combine your two passions than by decorating your classroom with Hogwarts-inspired decor. With a little creativity and some basic crafting supplies, you can transform your classroom into a magical world of wizardry and wonder. In this blog post, we’ll share some DIY Harry Potter classroom decoration ideas that are sure to impress your students.

2. House Banners

%filemane%

One of the most iconic symbols of Hogwarts are the house banners. You can easily create your own house banners using felt or paper in the house colors: red and gold for Gryffindor, green and silver for Slytherin, blue and bronze for Ravenclaw, and yellow and black for Hufflepuff. Hang them above the blackboard or on the walls of your classroom to give your space an authentic Hogwarts feel.

I used black table clothe and cut my banners with a triangle tips. I then printed the House logos big enough to fit in the center of each banner. I cut the logo out and used my laminator to laminate the logo and then hot glued it the banner. I printed and cut two for each banner as I made them double sided.

3. Potion Bottles

Create a collection of potion bottles to line your shelves and create an atmosphere of potions class. Fill clear bottles with colored water, add a label with a potion name and use string or wire to attach tags that display their ingredients and instructions. Make sure to include some funny and magical ingredients like “Dragon Blood” or “Flobberworm Mucus” to make your classroom feel like a true Potions dungeon. I purchased my potion bottles from Dollar Tree during the Halloween decoration season. Buy early they do go fast!

4. Wands

Set up a wand station in your classroom where students can pick out their own wand before the start of each class. You can create wands from dowels or wooden chopsticks, decorate them with paint, and attach tags with the students’ names on them. This will make your classroom feel like Ollivanders wand shop and get students excited for the magical lessons ahead.

For my personal classroom, I created wands at the beginning of the school year and they were able to select their welcome bag that corresponded with their house they were sorted into during the sorting ceremony. I took regular #2 pencils and spray painted them black. I then took hot glue and created different designs and painted with a silver/grey paint. These did take a couple coats to cover.

5. Quidditch Hoops

If you have a space large enough, you can create your own Quidditch pitch. Make hoops out of PVC pipe and spray paint them gold. Attach them to the walls or a stand and use a small ball as the Quaffle. This will allow your students to feel like they are part of the wizarding world and can bring some excitement to your classroom.

I did create smaller quidditch pitch using the rings from Dollar Tree found in the crafting section. I spray painted them gold and glued dowel rod to the bottom of the ring and then glued them onto my wall.

6. Floating Candles

Hogwarts is known for its floating candles, and you can create the same effect in your classroom. You can hang battery-operated candles from the ceiling using fishing line or transparent wire. This will create a magical and cozy atmosphere, perfect for reading or studying. My candles are from Dollar Tree and they come out during the Christmas Decoration Season.

These DIY Harry Potter classroom decoration ideas are sure to make your classroom a magical and exciting place for your students. By incorporating these decorations into your classroom, you’ll not only inspire your students to learn, but also give them a fun and memorable experience they won’t forget. Remember, the sky’s the limit when it comes to creating a Hogwarts-inspired classroom, so don’t be afraid to get creative and let your imagination run wild!

Filed Under: Classroom, Harry Potter Tagged With: #ClassroomDecorations, #DIYDecorations, #HarryPotter

5 Emotional and Social Calming activities for Students

March 19, 2023 by rautry

Students just as much as adults need to take care of both emotional and social well-being. With the increasing pressure to succeed academically, it is easy to feel overwhelmed and anxious. Therefore, engaging in calming activities can help reduce stress, improve mood, and increase focus. Here are five emotional and social calming activities that students can try:

  1. Mindful breathing: Mindful breathing is a simple but effective way to calm down and focus on the present moment. Create a quiet place, sit, and have students close their eyes. Tell students to take a deep breath in through their nose, hold it for a few seconds, and then exhale slowly through the mouth. Focus on the sensation of the air flowing in and out of the body. Repeat this for a few minutes or until you feel more relaxed. Alternative: Students can do this on their own by doing the Five Finger breathing or by the four square breathing.
  1. Journaling: Student can take a 5 – 10 minutes to journal. Writing down their thoughts and feelings can be a great way to process emotions and reduce stress. Set aside some time each class to write about their experiences, worries, and goals. You can also use journal prompts to guide their writing and spark new insights.
  2. Yoga or stretching: Practicing yoga or stretching can help release tension in the body and calm the mind. Look for guided student yoga or stretching videos online or images to try with students. Even just a few minutes of stretching during study breaks can make a big difference in how they feel and is a great brain break.
  3. Socializing with friends: Spending time with friends and loved ones can help improve their mood and reduce stress. Make time for social time in the classroom. The time you allow does not need to be long. Give students 3-5 minutes to take with one another and let them move around. Collect their attention and get them back on task when time runs out. You can also give them some prompts to talk about for example “This or That” or “Would you Rather” prompts.
  4. Listening to music: Music can have a powerful effect on our emotions and can be a great way to relax and unwind. Create a playlist of favorite calming songs appropriate for the classroom or find pre-made playlists on music streaming platforms. You can also listen to nature sounds or white noise to block out distractions and improve focus. Be sure to mix up when you listen to music in your classroom as students will expect this daily and feel as if they can only work when music is played.

Overall, taking care of a students emotional and social well-being is important for academic success and personal fulfillment. Incorporating these calming activities into your students daily routine can help them feel more grounded, centered, and ready to tackle whatever challenges come their way in your class and in their other classes.

Filed Under: Classroom

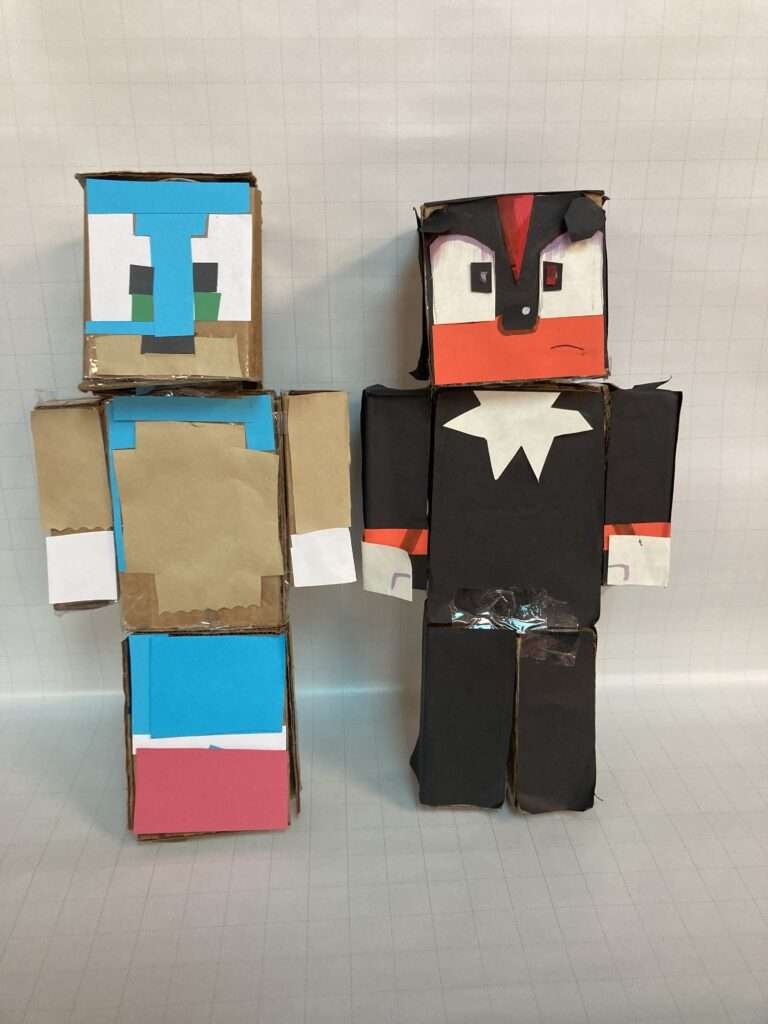
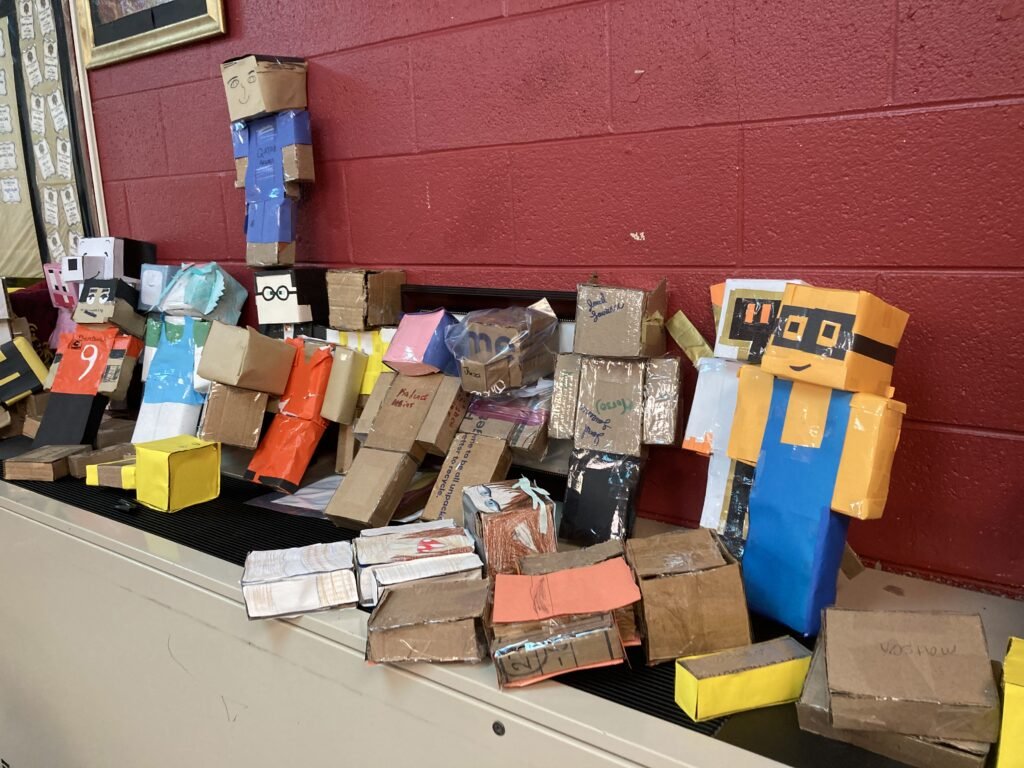
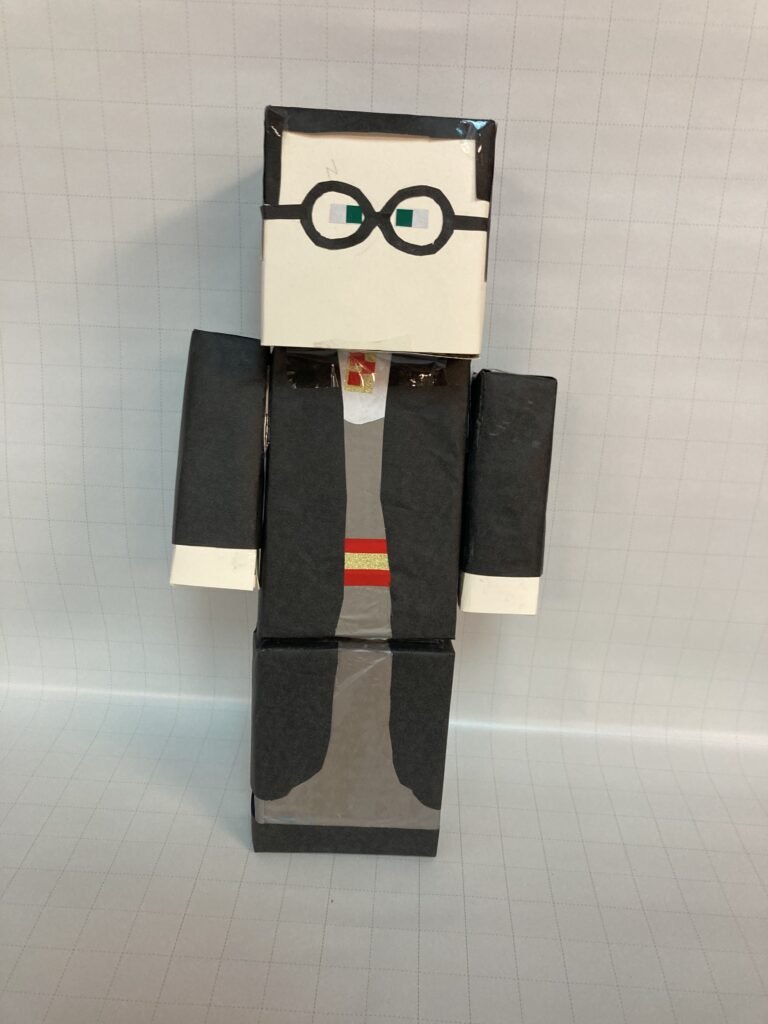
Minecraft Cardboard Character Build Project

March 17, 2023 by rautry

Minecraft Cardboard Character Build Tutorial

Minecraft is a popular video game that allows players to build and explore a 3D world made of blocks. But did you know that you can also use Minecraft as a learning tool? In this tutorial, we’ll show you how to build a cardboard Minecraft character and use it to teach students about area, perimeter, and surface area.

Materials:

  • Cardboard
  • Ruler
  • Pencil
  • Scissors
  • Glue or tape
  • Minecraft character reference image

Measurements for Minecraft Cardboard Character Build

You will have 5 body parts in total.

Head/Face – 4 inches by 4 inches. You will need 6 pieces

Torso – Front/Back 2 pieces = 4 inches wide by 6 inches tall. Sides 2 pieces = 1.5 inches wide by 6 inches tall. Top/Bottom 2 pieces = 1.5 inches wide by 4 inches long.

Arms – 8 pieces of 1.5 inches by 5 inches tall. Top/Bottom 4 pieces total = 1.5 inches by 1.5 inches

Legs – Front/Back 2 pieces 4 inches wide by 5 inches tall, Sides 2 pieces = 1.5 inches wide by 5 inches tall, Top/Bottom 2 pieces = 1.5 inches by 4 inches.

Tutorial Steps

Step 1: Choose your Minecraft character Choose your favorite Minecraft character and find a reference image online. This will be the basis for your cardboard character.

Step 2: Draw and cut out the shapes Using your ruler and pencil, draw the shapes for your Minecraft character onto the cardboard. This may include squares, rectangles, and triangles. Cut out the shapes with your scissors.

Step 3: Assemble the character Use glue or tape to assemble the shapes into your Minecraft character. Pay attention to the dimensions of each shape and how they fit together. This is where students can start learning about perimeter and area.

Step 4: Calculate the surface area Once the Minecraft character is assembled, measure the length, width, and height of each shape. Then, use the formulas for surface area to calculate the total surface area of the character. This is a great opportunity to introduce students to the concept of surface area and how it applies to 3D objects.

Step 5: Decorate the character Using markers or paint, decorate your Minecraft character to bring it to life! This is where students can get creative and add their own personal touches.

Step 6: Explore and learn Now that your Minecraft character is complete, use it to explore different concepts related to area, perimeter, and surface area. For example, you can measure the area of each shape individually, calculate the perimeter of the entire character, or compare the surface area of different characters.

Using Minecraft as a learning tool can be a fun and engaging way to teach students about math concepts. By building a cardboard Minecraft character and exploring its dimensions, students can gain a deeper understanding of area, perimeter, and surface area.

Topic: Minecraft Cardboard Character Build.

Interested in more classroom craft items check out the classroom category.

Filed Under: Classroom, Math Projects Tagged With: #cardboard, #DIY, #Minecraft, #Virginia Math Standards

Top Tips to Prep for Classroom Setup

July 24, 2021 by rautry

Here are the top tips to prep for classroom setup

1. Know your room

If at all possible take pictures of your classroom from every possible angle. Believe me you will want to reference these over and over as you prepare to setup your room. Get yourself a notebook and take inventory and be as detailed as possible.

Things to look for:

  • Outlets how many and where they are located
  • Chalkboards/Dry Erase Boards how many and where they are located
  • Promethean Board/TV, where is it located
  • Flag, How is it hung and where is is located
  • Windows, how many and where are they located
  • AC Unit, what kind and where is it located
  • Fire Extinguisher, where is it located
  • Door(s), where is it located and does it have a window, will you need to be able to cover it?
  • Clock, where is it located and is it powered by the school or do you need to add a battery
  • Storage, do you have a storage room, bookshelves, cabinets?
  • Furniture, what furniture is in the room, teacher desk, how many student desks, podium, rolling cart, bookshelves, file cabinets, etc.

Are you seeing a pattern? Make sure you know where everything is located and this is why pictures come in handy because we can’t always remember on our own.

Also take a look at the types of walls. Are they drywall, cinder block, panels? What type of ceiling do you have? Is it a grid, stucco, etc? Personally, go the extra mile and take a measuring tape with you and measure everything, yes everything. So this is the math teacher in me! These measurements come in handy when you are thinking about how you are going to setup and what will fit on your walls.

2. Clean your room.

Yes most schools will have the floors waxed and cleaned during the summer but I also have learned that even just one weeks time of a classroom being cleaned can accumulate dust.

Get yourself a broom and a dust pan and you can pick these up for a few dollars at Dollar Tree. Dollar Tree sells the handle separate from the brush so you will get the complete set for $2.

Make sure to do a complete sweep of your classroom and mop. You can also find a mop sweeper at Dollar Tree as well as the wet and dry pads.

Does your classroom has carpet you will also want to invest in a simple vacuum. Check yard sales or thrift stores. Be sure to test them before you buy. Even if you don’t have carpet you may have a rug in your room you will want to vacuum.

Take some lysol wipes and wipe down all your surfaces, bookshelves, etc. Clean your boards off including your bulletin boards so having a staple remover on hand is a good idea. I have my first day tool kit that includes the following:

  • tape measure
  • broom and dustpan
  • wet and dry mop
  • Lysol wipes
  • disinfectant spray
  • hand sanitizer
  • trash bags
  • hammer
  • staple remover
  • dry erase board cleaner
  • paper towels
  • masking Tape
  • duck tape (I use Black from Dollar Tree)
  • painters tape
  • packaging tape (My favorite is from Dollar Tree)
  • glue gun and glue sticks
  • furniture sliders
  • paint scraper
  • double sided tape
  • exacto knife
  • fishing wire
  • notebook
  • pencil/pen
  • mini fan
  • water
  • light snack
  • air freshener
  • zip ties
  • magnets
  • velcro
  • drop cloth
  • level
  • nail gun and staples
  • Screw driver set
  • Allen wrench
  • sewing kit
  • personal hygiene items (deodorant, feminine items)

Not all these things will be used on the first day but are part of my setup items I need to be prepared to decorate which we all love to do. Many schools turn off the AC during the summer so having a fan of any type will help your sanity and cool you down.

One more thing before we move on. The schools I have taught in have had little critter issues and setting out traps or asking to have the custodial staff spray your room for insects might be a good idea. It is my hope that schools will do this, but to be extra cautious I always ask and put in a request.

Plan to Prep for Classroom Setup

3. Make a plan

Before you start the decorating, make a plan. Having pictures of your classroom you can set-up your classroom visually by loading them into Canva. If you have not already signed up for a free teacher account I highly recommend doing so. This is not sponsored by Canva, I just really like using it for all my images.

Once you have an idea of your walls and floor layout you can then start making your To Do Lists and putting them in order of importance.

You will want to leave the items that are ok to finish during the school year that don’t hinder how your class will run. Save those to the end. Understand some tasks will take you longer than you may think.

Do your best to print, cut, laminate and label before you move into your classroom. These items can be done at home, I know many who prefer to do them at the school during the time they are in the classroom however I prefer to spend my time in the classroom for setup and not the tedious cutting and laminating. *Hint: Label everything! Your items may grow legs and walk off but if you label it then it tends to find its way back to your room. Trust me, label everything no matter how big or how small

Don’t over do your days. Plan out 2-3 major tasks you want to accomplish each day.

My plan is as follows:

Day 1 – Clean my room/move my items from previous room to new room

Day 2 – Put up my wall coverings (I cover 1 wall with brick paper, 2 walls with black fire resistant bedsheets).

Day 3 – Floor layout setup – move furniture

Day 4 – Bulletin boards and wall hangings

Day 5 – Setup my area and minor hanging items

My days are listed as an overall theme but each day does have multiple tasks within them. Lastly, don’t be hard on yourself if you don’t get everything you wanted to accomplish in one day. Remember some tasks may take you longer than you think especially if you are setting up on your own.

Also if you are moving into a classroom that has tons of items left behind this may also be one of your days you want to add to your list. Focus one whole day on going through and organizing items left in your classroom.

4. Be Prepared before you start

So you are ready to get started and to decorate your classroom but I have another tip for you before you start. Make sure you have all your materials you are using to decorate your classroom. The last thing you want to do is have to stop by another store after you leave your classroom for the day to get more material.

Having your measurements of everything you can do some simple math when you are out purchasing items so you don’t over buy. On that note, if you are looking for bins or furniture items check with other teachers that may cleaning out or some schools will have a teacher free area where teachers will place items that are still usable but they are not needed in their classrooms anymore. Also check your local Pay Nothing Groups on Facebook or even the Facebook Marketplace.

Make sure to gather all the tools you may need before you start. I purchased a toolbox from Dollar Tree that I have my screw drivers, allen wrench, level and hammer.

5. Be Flexible

When you start setting up your classroom you will want to take a step back and take a look at many angles of your classroom and consider the following.

When setting up bulletin boards, what is your purpose and what function do they play? Do they need to be readable from all areas of the classroom? This is very important when you are writing on boards as well.

If something is not working right, don’t be afraid to make adjustments. Your room needs to be inviting but also needs to be functional. Your first year you may change things over and over but as you learn what works for your room you will have a better understanding of what is needed for your room.

Topic: Top Tips to Prep for Classroom Setup

Filed Under: Food, Life style Tagged With: #classroomsetup, #Simple

« Previous Page
Next Page »

Products

  • Household Handbook Household Handbook: Your Complete Home Management Binder $21.99 Original price was: $21.99.$9.99Current price is: $9.99.
  • Princess Tiana Tiara Princess Tiana Tiara SVG $0.99
  • Shaun The Sheep SVG Shaun the Sheep SVG Invitation $0.99
  • Super Mario Invite Super Mario SVG Invitation $0.99
  • Minecraft Favor Bag Minecraft Creeper Invitation $0.99
try.hpinstantink.com/cmfvfj

Copyright © 2025 · Genesis Framework · WordPress · Log in