Rebecca Autry Creations
  • Home
  • Piñata’s
  • Vacation Bible School
  • Wedding
  • Courses
  • Store

Handy Manny Measuring Tape Pinata

January 12, 2014 by rautry

Handy Manny Measuring Tape Pinata

Learn how to create a fun and unique Handy Manny Measuring Tape Pinata with this step-by-step guide! Perfect for a Handy Manny-themed birthday party or as a DIY craft project, our tutorial will show you everything you need to know to make your own colorful and functional pinata.

What you Need:

– Cardboard box

– Packaging Tape

– Purple Tissue Paper

– White Tissue Paper

– File Folders

– Bungee

How to Make:

1. Take your cardboard preferably a rectangle box.

2. Take your bungee and make a loop go thru a hole of a piece of cardboard. Secure with duck tape.

3. Tape the bungee with loop on the outside to the top of the box.

4. Make sure to add all your pinata fillings with candy and goodies and close it up.

5. Add the eyes by using  rolled up into a ball plastic bags. Cover with tape to make the shape.

6. Take your purple tissue paper and cover entire pinata and tape down.

7. Cover the eyes with white tissue paper.

8. Add the white mouth and purple forehead.

9. Add red tongue and black circles for eyes.

That’s it! You are Done!

Topic: Handy Manny Measuring Tape Pinata

Filed Under: Pinatas

Tinkerbell Flower Piñata Tutorial

January 11, 2014 by rautry

Are you hosting a Tinkerbell-themed party and searching for the perfect addition to make it truly magical? Look no further! Introducing our enchanting Tinkerbell flower piñata – a delightful party accessory that will add a burst of color and joy to your celebration.

tinkerbell flower pinata

Whimsical Design: Our Tinkerbell flower pinata is crafted in the shape of a beautiful flower, creating a whimsical and eye-catching centerpiece for your party decorations. The vibrant colors and intricate details make it a visual delight that captures the essence of Tinkerbell’s enchanting world.

Tinkerbell Flower Pinata Tutorial

What you Need:

– Cardboard box

– Packaging Tape

– Scissors

– Various Purple tissue paper

– Green Tissue Paper

– Purple Curling Ribbon

– Double Sided tape

– Scissors

– Pinata candy and party favors

– Baseball Bat – Cord/Thick String (For Smashing Pinata at Party)

– Bungee cord

How to Make:

Step 1: Create the Flower Shape Take a piece of cardboard and cut it into the shape of a flower, ensuring you cut both a front and back piece.

Step 2: Secure the Flower Structure Use strips of cardboard with your desired width to secure both the front and back pieces, following the natural curves of the flower. I used a 3.5 inch width about the size of the flaps of a box.

Step 3: Reinforce with Bungee Cord Create a loop with a strip of cardboard, make a hole in the middle, and thread it through with a bungee cord. Tape it down securely, with the bungee loop facing outward.

Step 4: Fill with Fun Surprises Fill the pinata with tissue paper or newspaper, along with a delightful mix of candies and pinata favors. Seal the pinata shut taping it closed with clear packaging tape.

Step 5: Cover in Vibrant Tissue Paper Wrap the entire piñata with dark purple tissue paper for a visually stunning effect. I used a glue stick to keep the purple tissue paper on the box.

Step 6: Add Light Purple Flower Accents Cut smaller light purple flowers for both sides of the pinata and attach them for an extra touch of charm.

Step 7: Green Tissue Paper Fringe Take green tissue paper, fold a 3-inch strip, cut slits about 1 inch apart, and attach it to the rim of the piñata on both sides.

Pro tip: Attach first and then cut slits for a neat finish.

Step 8: Outline with Curling Ribbon Enhance the inner flower on both sides by outlining it with colorful curling ribbon for a finishing touch.

Now you have a beautifully crafted flower piñata ready to be the highlight of your party! Get creative, have fun, and enjoy the colorful and festive atmosphere you’ve created with your DIY masterpiece. Your guests are sure to be impressed!

That’s it! You are done!

Topic: Tinkerbell Flower Pinata Tutorial

Filed Under: Pinatas

How to make Optimus Prime Pinata

January 8, 2014 by rautry

Learn how to make an Optimus Prime Pinata for your next Transformers-themed party with this step-by-step tutorial. Perfect for kids and adults alike, this fun and easy DIY project will add a touch of excitement to your celebration. Get ready to have a blast with Optimus Prime!

How to Make Optimus Prime Pinata

What you Need:

– Cardboard Box

– Tape

– Scissors

– Red, Blue, Grey or Silver, Black Tissue Paper

– Bungee Cord

How to Make Optimus Prime Pinata:

1. First take your cardboard box and shape it into the cabin and trailer of Optimus Prime.

2. Cover with Silver or Grey Tissue paper over the trailer.

3. Add tissue paper to the cabin. I cut out most of the piece individually and attached with tape.

4. Make sure you fill pinata with goodies before closing up. My pinata back end stayed open until I was completely ready to close.

5. Attach bungee cord to cardboard and tape down.

6. Create a hole in the middle of the top of the trailer and push thru the bungee cord. Secure with tape.

7. Close up the pinata and cover up any holes.

That’s it! You are Done!

All items were purchased at Dollar Tree with the exception of the cardboard box. I did however asked when I saw them throwing out boxes if I could have them. They said sure and I got a good selection of sturdy boxes.

Topic: Optimus Prime Pinata Tutorial

Filed Under: Pinatas

How to make a DIY Minion Pinata Tutorial

December 5, 2013 by rautry

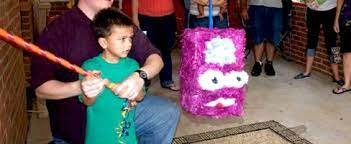
How to make a Minion Pinata Tutorial from Despicable Me

I was seriously trying to talk my son out of a Despicable Me Theme birthday party because I could not think of any ideas for decorations except a million minions!!! However when I finally sat down to plan out my party details with my handy Party Planning Printable I was able to come up with many, many Despicable Me Party ideas and can’t wait to make them all and show them off! I came up with the plan to make a Minion Pinata and while creating I wrote down my steps to make this Minion Pinata Tutorial.

Be sure to check out other DIY party supplies.

Pinatas are a fun and exciting addition to any celebration, especially for kids. If you’re planning a Despicable Me themed party, a Minion pinata is the perfect DIY project. In this step-by-step guide, we’ll show you how to make a Minion pinata that will be the hit of the party.

What you Need:

– Cardboard box

– Packaging tape

– Bungee

– Yellow, White and Blue Tissue paper

– Black Plastic Tablecloth

All of these items can be found at Dollar Tree for $4 total. The cardboard box you can ask if they have any boxes they are getting rid off. You can find boxes at gas stations. Any medium size box will do.

Despicable Me Minions Party Pack $21.99

A Despicable Me Minions Party Pack great for 10-16 guests. A Party in a Box! Cards and Favor Bags are Handmade.

How to Make:

The Base of a Minion Pinata.

1. Take your cardboard box and cut the side so it will lay flat. Go from one side and roll it into a tight overlapping circle. Unroll and do the same from the other end.

2. Tape your box at desired width both inside and outside.

3. Secure the bottom by taping it down inside and outside.

4. Curve the tops of the box and tape into place leaving an area so you can fill it with pinata goodies. I used plastic baggies about halfway added the goodies and then added more plastic bags to the top and help shaped the head area.

5. Close off the top by adding the bungee looped thru a piece of cardboard and attached using tape. Make sure to completely secure the loop.

To Decorate the Minion Pinata.

6. Take white tissue paper and cover the entire Pinata and tape it down. This helps allow the yellow to pop out. Otherwise the yellow will look brownish from the cardboard.

7. Take the yellow tissue paper and wrap the pinata. I used double sided tape to secure it all down.

8. Cut the Blue tissue paper to make it look like a pair of overalls. Include the straps. Secure it on the pinata with tape.

9. Cut a black strip from the plastic tablecloth to fit around the head area for the glasses band. Secure with tape. Cut a halfway U shape out of the black plastic table cloth for the mouth and adhere it to the pinata.

10. Take some cardboard 3/4 in with by 10 -12 inches long and make 2 circles and tape together. These are the goggles. Cover them with grey or silver tissue paper or duck tape.

11. Next cut out 2 cardboard circles that fit just inside your goggles and cover those with white tissue paper.

12. Cut a slightly smaller set of circles from the cardboard, these can remain brown.

13. Cut a set of circles from either black cardstock, construction paper of the black plastic tablecloth. These are the eyes.

14. Put your eyes together the white is the base, then brown and then black. Adjust them accordingly to your desired look.

5. Add the blue pocket to the front of the overalls. Use a piece of cardboard and cut out your pocket shape. I added a few pieces of the plastic table clothe and taped it down. The add the blue over the pocket shape and tape down. Take a blue marker and make your stitches marks, you can also use yellow but it may not show up very well. Adhere the pocket to the pinata. Did you notice mine is upside down!!! I have changed it for the final picture!!!

16. Add buttons to your overalls. You can use real buttons if you have them. I cut out a set of cardboard circles and covered them with black plastic table cloth and secured them with tape to the pinata.

hat is it! You are done!

The total cost for me was FREE having done several theme parties, I already had everything on hand, I save colored tissue paper, plastic table cloths, and any paper to reuse for future parties. The only thing I am constantly buying is packaging tape!!!!

Check out my other Despicable Me Decoration Ideas.

Check out these other Pinata Tutorials

Treasure Chest, Mario 1Up Mushroom, Tinkerbell Flower, Frog Prince, Blues Clues, Spider-man, Optimus Prime,

Lightening McQueen, Batman, Power Rangers, Transformers, Princess Castle, Dora’s Backpack, Smiley Face, Donald Duck, Handy Manny Measuring Tape

Topic: How to make a Minion Pinata Tutorial from Despicable Me.

Filed Under: Pinatas

« Previous Page

Products

  • Household Handbook Household Handbook: Your Complete Home Management Binder $21.99 Original price was: $21.99.$9.99Current price is: $9.99.
  • Princess Tiana Tiara Princess Tiana Tiara SVG $0.99
  • Shaun The Sheep SVG Shaun the Sheep SVG Invitation $0.99
  • Super Mario Invite Super Mario SVG Invitation $0.99
  • Minecraft Favor Bag Minecraft Creeper Invitation $0.99
try.hpinstantink.com/cmfvfj

Copyright © 2025 · Genesis Framework · WordPress · Log in