Rebecca Autry Creations
  • Home
  • Piñata’s
  • Vacation Bible School
  • Wedding
  • Courses
  • Store

Spiderman Favor Bags Rebecca Autry Creations

November 10, 2019 by rautry

These are great for a Spiderman or Avengers theme party. Very easy and inexpensive to make. You can make 10 for less than $1.20 or so. The red paper bags are 10 ct from Dollar Tree. Wal-mart has the same red bags but cost around $.33 each.

Customize your birthday party with these Spiderman favor bags. Read the step by step Spiderman Favor bags on how to make them.

What you Need:

– Red Paper Favor Bags 10 count from Dollar Tree

– Black, White Cardstock

– Black Sharpie

– Ruler

– Glue Stick

How to Make:

Step 1

Lay your red paper favor bags flat on a table top. Take your black sharpie and draw straight lines using a ruler. Corner to Corner (diagonally) and straight across and up and down.

Step 2

Draw in the web connecting the lines making two rows using your black sharpie marker. Make sure to go around the entire front of the paper bag.

Step 3

Cut your Spidey eyes from white cardstock or construction paper. The base is black slightly larger than the white.

Step 4

Glue the white spidey eyes on top of the black base and then glue the black onto the bag. Make sure the are secured down and the glue dries. You can use double sided tape that can also be found at Dollar Tree.

That is it! You’re Done!

Topic: Spiderman Favor Bags

Filed Under: Uncategorized

Do you feel a draft? Rebecca Autry Creations

November 10, 2019 by rautry

Here is something I learned today. Our living room has been a bit chili even though our inside temp says 75.

Well while we were waiting on snow to appear we had the curtains pulled back and I went to shut them a little and noticed the breeze coming from the top of the window. Sure enough it was open.

I then decided to check the other window. Same thing it was open at the top.

About an hour later after dinner we decided to get the kids ready to go play outside in the snow, as I went to the restroom I felt another draft similar to the one before. I checked the window and yup that one too was open.

I then decided to check our bedroom windows and yup those were open too! So guess what I decided to go through out the house and check them all.

Most of the remaining windows were also open at the top.

The odd thing is all of them were unlocked and opened about an inch each.

So do me a favor and go take a look at all your windows and make sure they are open or shut to your liking because you might feel an unwanted draft!

Thanks for reading.

Topic: Do you feel a draft?

Filed Under: Uncategorized

How to Make Old School Batman Piñata

November 10, 2019 by rautry

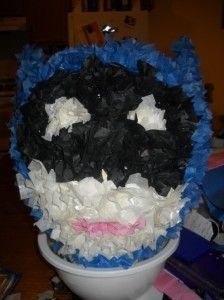
How to Make a Old School Batman Piñata

Pinatas are fun and lets face it they don’t come cheap when it comes to crushing it to pieces. This easy and budget friendly tutorial will alleviate the stress of spending tons of money of something that will not last very long. Let get to it with your very own Batman Pinata.

What you Need:

– Cardboard box/Large balloon

– Tissue Paper (blue, black, white)

– Bungy Cord

– Packaging Tape or Duck Tape

– Flour

– Warm Water

– Glue

– Scissors

– Pencil

– 2 inch strips of paper preferably notebook paper or newspaper

– Candy and piñata fillings (be creative and have items that connect to the theme)

How to Make:

1. First take your balloon and air it up to the desired size. Tie it off.

2. Take your paper and shred into 2 inch strips if not already done.

3. Make a paste of flour and warm water.

4. Carefully take a strip of paper and dip into paste, add it to the balloon. Cover the entire balloon in one layer.

5. let it sit and dry you can use a hair dryer on a lower setting to dry faster. Depending on how wet the paste is the longer it takes to dry.

6. Repeat steps 4 and 5 until ballon is covered and dry with desired amount of layers. Easy to break piñatas 4-5 layers, harder to break 10 layers.

7. Once the piñata is very dry you can pop the balloon inside if it has not already popped. Cut out a 4 inch by 4 inch area on 3 side to allow it to flap open, this is the entry way for the candy.

8. Reinforce handle (bungy cord) with cardboard and tape. Create a hole at the top of the piñata for the handle just enough the bungy cord can fit thru. Secure with tape.

9. Now the fun part! Time to decorate! First draw on the piñata your pattern to follow. Cut tissue paper in small squares about 2 inches by 2 inches.

10. Use the pencil, eraser side and place in the middle of a tissue paper. Dip in a glob of glue and place on the piñata in the desired area according to your pattern. Do this for entire piñata.

11. Before securing the open flap be sure to place your piñata candy and party filling favors. Secure the open flap with tape and then cover with tissue paper.

Congrats, You Did It!

What other Batman Party Ideas can you think of?

Check out these other Pinata Tutorials

Treasure Chest, Mario 1Up Mushroom, Tinkerbell Flower, Frog Prince, Blues Clues, Spider-man, Optimus Prime,

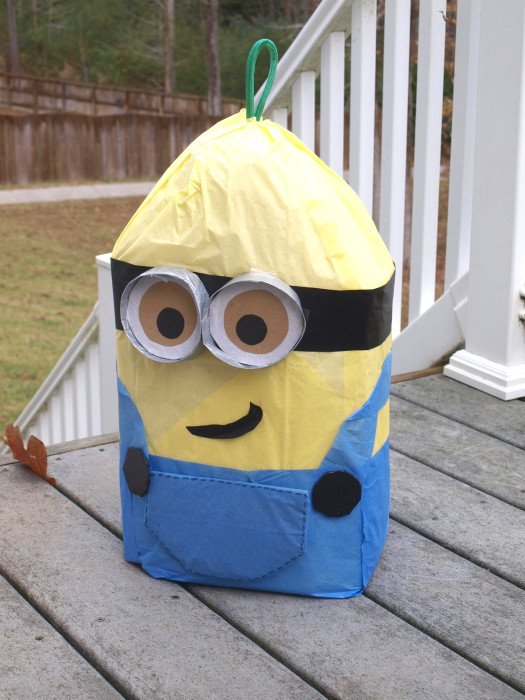
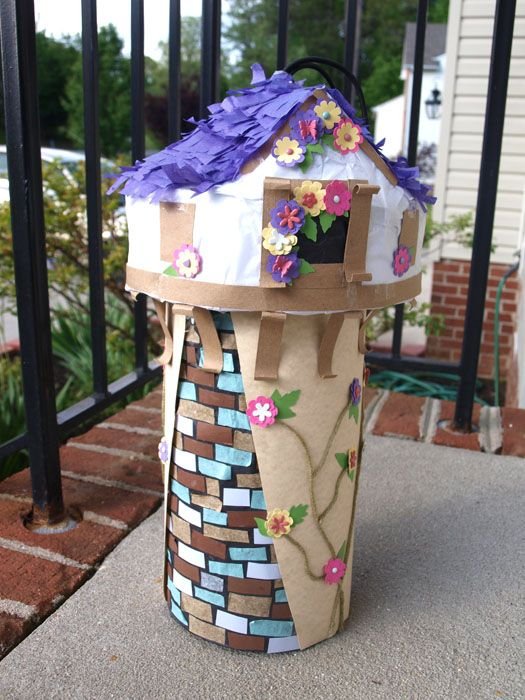
Lightening McQueen, Power Rangers, Transformers, Princess Castle, Dora’s Backpack, Minion, Smiley Face, Donald Duck, Handy Manny Measuring Tape

Topic: How to Make a Old School Batman Piñata

Filed Under: Pinatas

How to Make a Transformers Piñata

November 10, 2019 by rautry

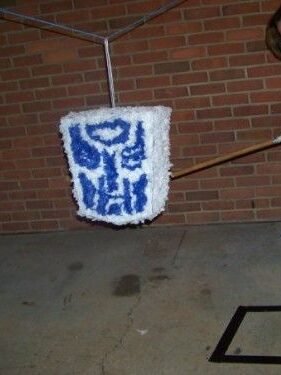
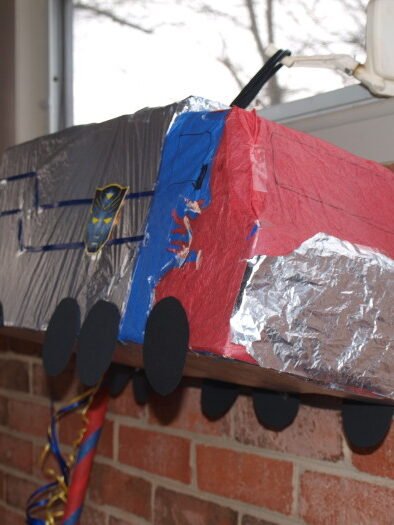
Are you an Autobot or a Decepticon Fan? No Matter which you like best we all like to take a swing at pinatas, even if they are Transformers in disguise!

What you Need:

– Cardboard box/Large balloon

– Tissue Paper (red, black, white)

– Bungy Cord

– Packaging Tape or Duck Tape

– Glue

– Scissors

– Pencil

– Candy and piñata fillings (be creative and have items that connect to the theme)

How to Make:

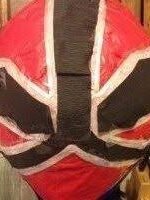
1. First take your cardboard box and cut your pattern of the Autobot Transformers sybol. I made the same pattern for both front and back and decided on a 4 inch width for the sides.

2. Take your duck tape and tape the sides to both the front and back until all is covered and taped together.

3. Cut out a 4 inch by 4 inch area on 3 sides (on the side width)  to allow it to flap open, this is the entry way for the candy.

4. Reinforce handle (bungy cord) with cardboard and tape. Create a hole at the top of the piñata for the handle just enough the bungy cord can fit thru. Secure with tape.

5. Now the fun part! Time to decorate! First draw on the piñata your pattern to follow. Cut tissue paper in small squares about 2 inches by 2 inches.

6. Use the pencil, eraser side and place in the middle of a tissue paper. Dip in a glob of glue and place on the piñata in the desired area according to your pattern. Do this for entire piñata.

7. Before securing the open flap be sure to place your piñata candy and party filling favors. Secure the open flap with tape and then cover with tissue paper.

Congrats, You Did It!

Check out these other Piñata Tutorials

%filemane%
%filemane%
%filemane%
%filemane%
%filemane%
%filemane%
%filemane%
%filemane%
%filemane%
%filemane%
%filemane%
tinkerbell flower pinata
%filemane%
%filemane%
%filemane%
%filemane%
%filemane%
%filemane%

Topic: How to Make a Transformers Piñata

Filed Under: Pinatas

Cotton Candy Cones Tutorial

November 10, 2019 by rautry

By Rebecca Autry September 24, 2013 September 19, 2015 Disney Anger Invitation Tutorial How to Make Bananas Last Longer

This site uses Akismet to reduce spam. Learn how your comment data is processed.

FacebookTwitterGoogle PlusCustom Social

Filed Under: Uncategorized

Coupon Lingo: Abbreviations and all! Rebecca Autry Creations

November 10, 2019 by rautry

$$/$$ – This means $ off when you spend $ amount. Example: $5/$30 is $5 off your purchase when you spend $30. (Check to see if the amount has to be before or after coupons to apply.) $/# – This means that you get $ off for every # you buy. Example: $5/2 would mean that you get $5 off every 2 that you buy. $1/1 – One dollar off one item $1/2 – One dollar off two items 2/$1 – Two items for one dollar 3/$2 – Three items for two dollars B1G1 – Buy one item get one item free B1G2 – Buy One Get Two Free B2G1 – Buy two items get one item free Beep – Sometimes the register will beep when a coupon is scanned to indicate that the cashier need to take an action, like entering a price. Blinkies – Grocery/drugstore coupon dispensers with blinking lights BOGO – Buy One Get One Free CAT – Catalina. A coupon that prints out at the register that is either $$ off your next purchase or $$ off a certain product. Note: These are sometimes delayed in printing so wait a minute before walking away from the register. If you think you were supposed to get one and didn’t, talk to the cashier/manager and explain. Catalina coupon, prints from a separate machine when your receipt prints. CRT – Cash register tape, usually used when referring to CVS coupons that print with receipt. Closeouts – These are typically greatly reduced items that the store does not plan on re-stocking. Couponing Policy – This is the statement that each individual store abides by, in relation to coupons. What is typically included in their policy is whether they: take competitor’s coupons, take coupons past expiration dates, “double” or “triple” coupons, accept Internet Printables or if they even accept coupons. Coupon Insert – These are “packets” of coupons found in Sunday papers and also sometimes in the ads mailed to you during the week. These are typically sent out by Smart Source (SS or S), Red Plum (RP) and Proctor & Gamble (PG)They are also referred to as inserts, S, SS, RP and PG. Discontinued – This means that a store has depleted their inventory of an item and does not plan on re-stocking it. Double Coupons = This is the term used when stores will double a coupon’s value. Example, if you have a $1 off coupon, they’ll take $2 off. Stores vary on how often they do this ranging from never, always, on occasion or specific days of the week. Some stores may also set a maximum value limit. Example, no coupons over $2 and only 10 per transaction/day. DND – Do not double Ea. – Each ECBs – Extra Care Bucks, CVS loyalty rewards system ES =Easy Saver. This is Walgreens’ monthly rebate program. You can find the books by their ads in the store. ETS – Excludes trial size Exp. – Expires FAR = Free After Rebate FAE = Free after Extra Care Bucks FARR = Free After Register Rewards GC – Gift card Inserts – These are “packets” of coupons found in Sunday papers and also sometimes in the ads mailed to you during the week. These are typically sent out by Smart Source (SS or S), Red Plum (RP) and Proctor & Gamble (PG) They are also referred to as coupon inserts, S, SS, RP and PG. Internet Printable = A coupon that can be printed online. Also referred to as IP or Printable. IP = Internet Printable Coupon. Also referred to as “printable.” IVC – Instant Value Coupon, Walgreens’ store coupons found in ads and monthly booklet MFR = Manufacturer MIR – Mail-in rebate OOP – Out of pocket. This is the amount of money that you have spent after coupons, ECBs, RRs, Catalina’s OOS – Out of stock. This means that the store is temporarily out of an item but plans on getting in more inventory. Sometimes they will offer a rain check in cases like these. OYNO – On your next order, Used when referring to coupons that you can use on your next order at that store. OYNP = On Your Next Purchase. Used when referring to coupons that you can use on your next purchase (order) at that store. Peelie – Peel-off coupon found on product packaging Printables – These are coupons that you can print online. Also referred to as IP or Internet Printables.. PSA – Prices starting at

Q – Coupon

Rain check = A slip you can ask for in the store when an item’s on sale and out-of-stock. Some sales will specifically say “No rainchecks” and some stores will put an expiration date on their rain checks. RRs – Register Rewards, Walgreens’ Catalina coupons Rolling Catalinas – This means that you can use a catalina (see definition) as payment on another transaction of equal merchandise and another catalina will still print. Example, if you buy 5 “name brand items,” a $5 catalina will print. If you then buy another set of those same 5 “name brand items,” you can use the previous catalina you received as payment towards the order and another $5 catalina will print. SCR – Single Check Rebate, Rite Aid monthly rebates program Stacking – Using both a manufacturer’s coupon and a store coupon on one item Tearpad – Pad of coupons attached to a display, shelf, or refrigerator door. Triple Coupons = This is the term used when stores will triple a coupon’s value. Example, if you have a $1 off coupon, they’ll take $3 off. Stores vary on how often they do this ranging from never, always, on occasion or specific days of the week. Some stores may also set a maximum value limit. Example, no coupons over $2 and only 10 per transaction/day. UPC = Universal Bar Code. This is the bar code that’s scanned on products for pricing/info at the stores. Several companies will ask you to mail these in on rebates +UP Reward – Rite Aid reward program WAGS = Abbreviation for Walgreens WT = Wine Tag. These are coupons that you’ll find hanging on the wine bottles in the stores. WYB – When you buy YMMV – Your mileage (or manager) may vary, meaning some stores might give you a deal but others might not This is what you’ll see when someone

finds a deal but they want you to know that your store branch may not offer the same deal.

FacebookTwitterGoogle PlusCustom Social

Filed Under: Uncategorized

Basketball Favor Bag Tutorial Rebecca Autry Creations

November 10, 2019 by rautry

What you Need:

  • Orange Paper Favor Bags
  • Black Thick Sharpie

How to Make:

  1. Lay your orange paper favor bag flat on the table. You can purchase 12 ct from Amazon for under $4. Walmart.com has 12 count for $2. Unfortunately I have not been able to find orange paper favor bags at Dollar Tree.

2. Draw with your Thick black Sharpie the Basketball lines. You can purchase the thick sharpies at Dollar Tree or you can find them on Amazon for 2 count under $4.

Topic: Basketball Favor Bag Tutorial

Filed Under: Uncategorized

Fish Pinata Tutorial

November 10, 2019 by rautry

What you Need:

  • Cardboard box
  • Scissors
  • Bungee Cord
  • Yellow Plastic Table cloth
  • Ribbon
  • Easter plastic egg
  • Silver or different color table cloth or tissue paper

How to Make:

Step 1

Take a Cardboard box and cut your side of the fish and trace onto the 2nd to make a matching side.

Step 2

Take a 2 – 3 inch strip of cardboard and tape to one side until all the way around the Fish side. Repeat as you attach the other side. Make sure to specify your center for the bungee cord handle.

Step 3

Locate where you will put the bungee cord handle and create a hole. For better strength and protection add a second layer of the bungee cord and tape down.

Step 4

Fill your Fish Pinata with goodies. Tape shut

Step 5

Cover your Fish Pinata with the yellow plastic table cloth and tape well.

Step 6

Make your fish fins out of cardboard and cover with a second color of your choice. Attach fins to the side of the fish.

Step 7

Take your ribbon and trace the edges of the fish and glue or tape down.

Step 8

Take a plastic Easter Egg and split in half and use to secure it to the sides of the fish.

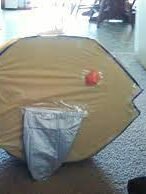
That is it! You are done!

Topic: Fish Pinata Tutorial

Filed Under: Pinatas

I'm so poor I made my kids Costumes! Rebecca Autry Creations

November 10, 2019 by rautry

I’m so poor I made my kids Costumes!

Yes you read that right, our family is very poor right now. There is alot going on and I will save you from the details but here is the honest truth. I do not having money to buy my kids costumes this year. Last year I was fortunate enough to be given the opportunity to review costumes.

This year my son’s and daughter asked to be a Super Mario Character mostly because we just finished a Super Mario Themed Birthday Party just a month ago.

My oldest was set on Being Mario. I has asked for places to find overalls. Well unfortunately I was not able to find him a pair. But with the material my sister gave me and a hat from the photo props I had I made him Toad!

I did however find my middle child a pair of overalls and a green shirt and then I used material I had to make him his hat. He became Luigi!

My daughter on the other had has been given dress up clothes so we have a fairy and while I was adding to her collection awhile ago we had gotten a Sleeping Beauty dress similar to princess peach for $4 shipped. So she went at as Princess Peach in her mind. Don’t try to tell her otherwise!

My husband payed me a compliment and said its official I am make our Comic Con costumes when we decide to go in the future.

I simply made the kids costumes because I do not have the money to buy them costumes.

I do however recommend checking out Thrift Stores the day after Halloween because you might find them at 50% off. Last year I go a brand new Incredibles costume unfortunately it is still too big for my kids.

So did you buy or make your kids costumes this year?

Filed Under: Uncategorized

LEGO Block Favor Bags Rebecca Autry Creations

November 10, 2019 by rautry

Below you will find a list of supplies you will need plus step by step in instructions on how to make LEGO Block Favor Bags.

What you Need:

– Red, Yellow and Black Cardstock

– Red, Yellow or Blue Favor Bags

– Glue

How to Make:

1. Cut your circles for your favor bag make sure you cardstock is a shape lighter or darker than the paper bags.

2. The Paper favor bags can be found at Dollar Tree in a 10pk for $1 or $.33 each at Dollar Tree.

3. Glue the circles onto your favor bag. You can make them into a 6 or 8 LEGO Block depends on the size of your circles.

That is it! You are done!

Topic: LEGO Block Favor Bags

Filed Under: Uncategorized

« Previous Page
Next Page »

Products

  • Household Handbook Household Handbook: Your Complete Home Management Binder $21.99 Original price was: $21.99.$9.99Current price is: $9.99.
  • Princess Tiana Tiara Princess Tiana Tiara SVG $0.99
  • Shaun The Sheep SVG Shaun the Sheep SVG Invitation $0.99
  • Super Mario Invite Super Mario SVG Invitation $0.99
  • Minecraft Favor Bag Minecraft Creeper Invitation $0.99
try.hpinstantink.com/cmfvfj

Copyright © 2025 · Genesis Framework · WordPress · Log in