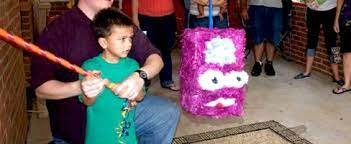
Handy Manny Measuring Tape Pinata
Get ready to party with the Handy Manny Measuring Tape Piñata! Perfect for any Handy Manny fan or DIY enthusiast, this piñata is sure to add some fun to your celebration. Fill it with candy and goodies, then take a swing at it to release the surprises inside.
What you Need:
– Cardboard box
– Packaging Tape
– Purple Tissue Paper
– White Tissue Paper
– File Folders
– Bungee
How to Make:
1. Take your cardboard preferably a rectangle box.
2. Take your bungee and make a loop go thru a hole of a piece of cardboard. Secure with duck tape.
3. Tape the bungee with loop on the outside to the top of the box.
4. Make sure to add all your pinata fillings with candy and goodies and close it up.
5. Add the eyes by using rolled up into a ball plastic bags. Cover with tape to make the shape.
6. Take your purple tissue paper and cover entire pinata and tape down.
7. Cover the eyes with white tissue paper.
8. Add the white mouth and purple forehead.
9. Add red tongue and black circles for eyes.
That’s it! You are Done!
Check out these other Pinata Tutorials